The best tubeless sealant will keep the air in your tyre for longer and actually fix punctures while you ride. No more inner tubes or patches!
Ditching your inner tubes and converting to tubeless is one of the most transformative upgrades in mountain biking. And since modern rims and tyres are usually ‘tubeless ready’, most new bikes already have all the pieces of the puzzle in the box. In fact, the only things you’ll have to buy are a couple of the best tubeless valves and a bottle of the best tubeless sealant. And that’s where this guide comes in, as we run down the best tubeless sealants on sale.
It almost goes without saying that to make your tubeless setting up a whole lot easier, it’s a very good idea to get yourself one of the best tubeless tyre inflators. And to help prevent punctures in the first place, you could check out our buyer’s guide to the best mountain bike tyres.

The Muc-Off No Puncture Hassle Sealant is our pick of the gloop.
1. Muc-Off No Puncture Hassle
If you want the best out there, this is it
Rating: 10/10
Reasons to buy:
- Simply the best
Reasons to avoid:
- Not the cheapest
- Individual sachets are much more expensive per ml than a 1 litre bottle
Muc-Off’s oddly named No Puncture Hassle sealant is not a cheap solution, but it happens to be very effective. We tested the 140ml sachet, is was plenty to fill a 29×2.4in test tyre using the included nozzle. This fits over the Presta valve stem, reducing mess and waste. Despite being one of the thickest sealants we’ve tested, Muc-Off’s No Puncture Hassle distributed evenly around the inside of the tyre, which will help ensure a speedy seal if the worst happens.
When we first squirted the full 140ml sachet there didn’t seem like much left in the bottom of the tyre, but the luminous pink gunk sealed our first 2.75mm hole in barely a revolution of the wheel. We then made a larger 5mm hole, which also sealed instantly and, while most products we’ve tested only sealed sidewall cuts temporarily, Muc-Off plugged it permanently. Available in 140ml pouches, and 1L or 5L bottles, Muc Off has sealed the nail on the head with this product.
Read our full review of the Muc-Off No Puncture Hassle sealant

Stan’s Race Sealant is highly effective and used by loads of pro racers.
2. Stan’s No Tubes Race sealant
The original and still one of the best
Rating: 10/10
Reasons to buy:
- Seals more than most
Reasons to avoid:
- Premium price
- Only available in a large 946ml bottle
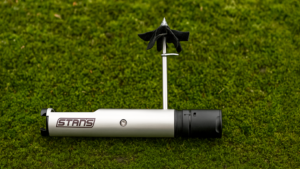
This is the sealant we use most in our workshop, and it has always performed brilliantly, even when we’ve been stingy with the quantity used when setting up a tubeless tyre. Stan’s Race formula uses more particles, of a larger size, so congeals better and can seal bigger holes.
It’s highly effective, helping to heal cuts and tears before all the air escapes and reducing the risk of rim damage. Sadly it’s only available in a large 946ml bottle, but in the long run this should work out cheaper than buying smaller sachets anyway.
Read our full review of the Stan’s No Tubes Race sealant

Orange Seal Endurance sealant claims to take longer to dry out.
3. Orange Seal Endurance
Really effective at sealing small and medium sized punctures
Rating: 9/10
Reasons to buy:
- Stays liquid longer than most
Reasons to avoid:
- Struggles with larger cuts
The big selling point for Orange Seal’s Endurance sealant is that it doesn’t dry out as quickly. In fact, the brand claims it will last up to 120 days, or four times longer than its standard product.
In our stab test, Orange Seal plugged the 2.75mm and 5mm holes with ease, but couldn’t quite cope with the 8mm sidewall cut. It sealed initially, but blew open again when we started riding. That’s a tough test for any sealant though, and one a plug kit would probably solve. In terms of value, Orange Seal is a bit pricier than its rivals, but if it lasts longer, it could be worth the premium.
Read our full review of the Orange Seal Endurance sealant

The Milkit conversion kit comes with everything you need to get up and running quickly and simply
4. Milkit Tubeless Conversion Kit
Everything you need to go tubeless in one kit
Rating: 8/10
Reasons to buy:
- Valves are excellent
Reasons to avoid:
- Expensive
- There’s better rim tape out there
While there’s nothing special about the sealant that comes with Milkit’s Tubeless Conversion Kit, if you are just setting out on your tubeless journey, then buying the complete kit in one go makes perfect sense. It also makes the process as simple as possible, with rim tape, tubeless valves, and a syringe kit to help you get the liquid in the tyre and not all over the floor of your shed/garage/workshop/kitchen. And everything packs into the syringe once you’re done.
Read the full review of the Milkit Tubeless Conversion Kit
How we test
To test the sealants’ operating temperatures, we put each of them in a freezer set to -18°C and an oven set at 50°C. Not exactly a real-world simulation, but it gave us an idea how the sealants would behave in warmer or colder climates.
Eventually sealant will solidify in your tyre. How long it stays liquid is affected by use, temperature, volume and the make-up of the sealant itself. Manufacturers recommend anything from two weeks to four months. Our advice is to check it regularly and top up as necessary.

You can add the sealant directly into the tyre, then install the bead over the rim, or fully install the tyre and inject the sealant through the valve.
To test the sealants’ ability to heal punctures, we filled a 29×2.4in tyre with 120ml of each of the sealants and then pierced it with a 2.75mm bradawl, a 5mm screwdriver and cut the sidewall with a 6mm scalpel. While it’s true that sidewall cuts are often way bigger than 6mm, or an irregular shape, very few manufacturers say their sealant will plug tears bigger than this so it’s a valid cut-off point. For us, plugging the two holes was a minimum, sealing the tear was a bonus.

Make this scenario a thing of the past.
Tyre sealant is a little like blood, in that sealing particles are suspended in a solution inside the tyre and get carried to any hole and congeal there to seal the opening. “The solution pushes the nano-platelets into the hole, which builds up in layers, so it plugs holes that are over 3mm wide”, explains Tom Makin from Peaty’s.
The trigger for the solidification is the mechanical force of the spray, says Mark Weir from WTB. “The spray is strong enough to break the latex droplets allowing isoprene molecules to link to each other forming a solid plug.”

Tubeless plus sealant usually equals a red face and white gunk all over the floor.
Does tyre sealant last forever?
No. All sealants work slightly differently but most are suspended in ammonia, which evaporates over time because the rubber tyre leaches air. We’d recommend periodically checking your tyres to see how much sealant is still liquid. Every year at a minimum, but ideally every six months, especially during a hot summer. Even small things, such as leaving your bike exposed to the direct sunlight, can make a difference.

Getting a good tubeless inflator pump will really help the seating and sealing part of the job.
Any tips for setting up my tyres tubeless?
The most important thing is to shake it up properly, to get the proper distribution of sealant agent to solution. With the sealant in the tyre and the tyre mounted on the rim, spin the wheel to coat the inside of the wheel evenly. If you’re struggling to get the tyre to seal, then try spraying around the rim/tyre interface with soapy water. This helps the bead slide against the rim. If the tyre is too baggy, and air escapes from the whole circumference, you may need to add another layer of tubeless rim tape.
How much sealant do I need in a mountain bike tyre?
This totally depends on the volume of your tyre, so diameter and width plays a part. As a rough guide, we would say 75-90ml for 27.5in tyres (2.1in to 2.6in) and 75-95ml for 29in tyres (2.1in to 2.6in). Don’t be tempted to run too much sealant as this a) wastes money, b) adds weight, and c) will unbalance your wheel, which can be felt as vertical oscillation when jumping.


