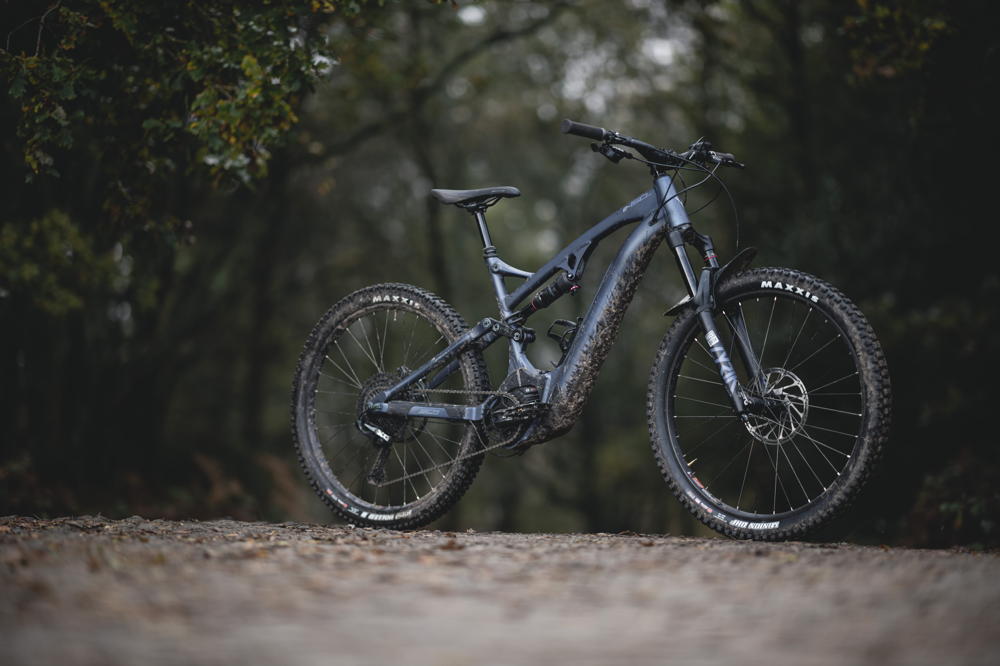
The geometry of your mountain bike dicates how it handles, and how it positions you on the bike. Understanding it will make you a better rider.

A bike’s angles and dimensions are the key to the way it rides; understanding how they interact will help you choose the right machine and unlock its potential.
>>> Mountain bike geometry explained: what’s reach, head angle, offset and trail?
Bike geometry can be daunting, but it doesn’t need to be. And by looking at it through the lens of weight distribution (bike + rider), we can simplify geometry dramatically without having to dumb it down. Step by step, we’re going to take a closer look at all the key aspects of bike geometry to see how they impact the rider’s weight distribution. After all, it is a system, and without considering the rider the numbers make much less sense.
In many ways the individual aspects of bike geometry can be seen as the building blocks on which handling is created. And in the same way that you learn your ABCs before writing complete words, understanding how all the seemingly independent aspects of bike geometry change weight distribution, will allow you to better understand how and why your bike rides the way it does.
And don’t think for a minute that the purpose of this feature is to transform everyone into bike engineers. It’s more about inspiring you to think about what’s going on beneath you as you ride. And once you start to notice where your weight is on the bike, and the effects it’s having on handling, you can then think about changing it.
>>> Why you shouldn’t believe the geometry charts
So regardless of whether we are talking about frame angles, sizing or fit, understanding how subtle changes to the geometry affect your weight distribution is key to unlocking your full riding potential. And understanding bike geometry isn’t even the ultimate goal here. It’s actually about how geometry helps us achieve a balanced, centred riding position on the bike. And this is of utmost importance because it can dramatically open up your range of movement, which makes everything easier and less fatiguing.
So in the first part of this series on bike geometry, we’re going to walk through all of the key aspects, from head angle to chainstay length, and how small changes in these numbers can have a big impact on the ride quality of your bike. And because we’re looking specifically at frame geometry and how it impacts the position of the rider’s centre of gravity (CoG), it makes sense to start from the ground up. In part two, we’ll look at how we can move that CoG by making adjustments to your bike.

Wheelbase
The wheelbase measurement is the foundation on which all other aspects of bike geometry are built. In simple terms, it’s the horizontal distance between the contact patches of the front and rear tyres, or the axles, if both wheels are the same size. And to really understand how the different aspects of geometry impact handling, we need to think of the wheelbase as the bottom of a triangle with the rider’s centre of gravity (CoG) at its apex. Using this simple model, it should be clear that, for a given centre of gravity height, having a short wheelbase makes the triangle less stable, while increasing the wheelbase makes the triangle, and subsequently the bike, more stable.
It’s also a great we to visualize how raising or lowering the rider’s CoG is the opposite side of the same coin when it comes to stability. And we’ll dive deeper into this when we discuss BB height, but for now, let’s stay focused on the wheelbase.
It should be clear from the geometry chart that the wheelbase measurement is the sum of the chainstay length and front centre measurement. The ratio of both measurements determines, to a large degree, the weight distribution of the bike and rider combined. Now, if we go back to the simple model of the triangle, we can see that shortening the rear centre shifts the rider’s CoG rearward while reducing the front centre moves it forward. To see how this shift in weight distribution impacts handing, we just need to take a look at early 29ers. To keep the overall wheelbase from increasing – with the associated increase in chainstay length that was needed to accommodate the bigger rear wheel – manufacturers shortened the front centre by reducing the reach and steepening the head angle; both changes moved the rider’s CoG forward. It’s hardly surprising than, that in addition to the improved rollover of bigger wheels, two virtues often extolled by early 29er coverts were the ability to keep the front end down on steep climbs and the improved front end grip on flat corners. Both traits were a direct result of the geometry shift, rather than the actual wheel size or the length of the tyre’s contact patch. It’s also why shorter stems made the bikes handle better, as they allowed rider to get their weight back more easily for cornering and descending.
Now let’s change gears for a second. If you think about an articulated lorry, or even a long wheelbase van, you’ll understand that changing the wheelbase also affects turning circle. But this analogy is far from ideal, as vans and lorries don’t lean over to turn and if they do, you’d better have your seatbelt buckled. So while it’s often stated that a shorter chainstay length makes a bike corner better, it should be obvious that the same can be said of a short front end, as it’s actually the overall wheelbase length that matters most when it comes to more upright steering. It’s the simple reason why longer wheelbase bikes are harder to navigate around flat switchback turns, as it’s the one time where you do more of your steering with the handlebar, and less by leaning the bike over.

Adjusting BB height with a flip-chip can have a big impact on a bike’s stability
Bottom Bracket height
Of all the geometry measurements, BB height is probably the easiest to get your head around. It’s easy to measure too, as it is the vertical distance from the BB centre to the ground. And while it would be easy to assume that BB height is just about optimising pedal clearance on different travel bikes, to do so would miss the bigger picture. That’s because, raising or lowering the BB height directly impacts the single heaviest component part on the bike… you, the rider. Which is why small changes in BB height can have a big impact on handling.
Now, if we return to the simple triangle analogy that we introduced to help understand the interplay between wheelbase and stability, it should be obvious that, if we lower the BB height, and subsequently the rider’s CoG, we can make the bike more stable without altering the wheelbase. In fact, up until recently, that’s been the primary reason why any bike with a geometry adjust flip-chip, for changing the BB height, would promptly get slammed into the low setting and left there. But with the advent of genuinely long, low, slack bikes, the high geometry position can be really useful, and even desirable, for adjusting the handling.
By tweaking the BB height you can instantly make the bike more or less dynamic. This is something I experienced first hand several years ago when testing an early GeoMetron with Chris Porter from Mojo. I started off on the longest GeoMetron – well, why not? – but it quickly became apparent that I couldn’t get to the bike to respond the way that I wanted. My motor patterns were so ingrained, that I’d see the part of the track I wanted to be on, my brain would send the impulse to my arms and legs to move, but invariably I’d keep missing my lines. Raising the BB height to make the bike less stable and more manoeuvrable went a long way to bring my inputs, and the bike’s outputs, closer together. But I was still convinced that the bike was too big for me, so I tried the next size down with the exact setup that I’d ended up with on the bigger size. Much to my surprise, I didn’t get past the first two corners before stopping to lower the BB height. The shorter bike felt too unstable in the high BB setting due to the shorter wheelbase. So it’s clear that sizing and BB height are closely related, and with modern bikes the flip-chip is more important than ever, as the high setting can help bridge the gap between the old and new testaments of bike sizing.
After my initial GeoMetron test session, Chris asked me if I thought the longest version was too big me, and my considered response was, “right now it is, but maybe when every other brand catches up and my responses have had time to adapt, probably not.”

Front centre
One of the coolest things that came out of Mondraker Forward Geometry experiment was that longer bikes climbed better, but how could this be? To uncover that, we need to back up to 2013 and take a closer look at how Mondraker changed the way we think about geometry, sizing and fit. At that time, most trail bikes came with 70mm stems and Mondraker’s stroke of genius was to chop 60mm out of the stem length and add it directly to the front triangle. With its custom 10mm stem, Mondraker was able to maintained the same fit, while introducing an increase in front centre measurement roughly equivalent to a three-fold jump in frame size. It was a radical change, and while the super short stem never caught on, Forward Geometry is now universal.
So we know from our simple model that increasing the front centre has the effect of moving the rider’s CoG rearward, so how did Mondraker’s Forward Geometry make the bike climb better? It’s because our overly simplistic analysis does not account for the fact that moving the entire steering assembly forward by 60mm also has a big impact on weight distribution. And you may find it surprising, but the combined weight of all the component parts that make up the steering assembly, including the fork, front wheel, cockpit an so on, account for more than one third the total weight of the bike. Moving that amount of weight forward acts like a counter balance to the rider, which helps keep the front end planted on climbs. It’s why battery placement on e-bikes is so critical. It has absolutely nothing to do with frame geometry, but it has everything to do with manipulating the weight distribution of the system, and ultimately the handling of the bike.

Mondraker’s swingarm inserts allow for 10mm of rear centre adjustment
Rear centre
Chainstay length is synonymous with the rear centre measurement, as it doesn’t actually refer to the length of the chainstay. And as we’ve outlined in the wheelbase section, shortening the rear centre gives the bike a more rearward weight bias, while lengthening it shifts the riders CoG forward. So if you what balanced handing and weight distribution across a range of sizes, the rear centre must increase in relation to the front centre.
To achieve that, some brands use two rear ends, split across the size range. Take the YT Jeffsy, for example. The extra small, small and medium all have 432mm stays, while the L and XL extend by 5mm to 437mm. And while 5mm doesn’t sound like a lot, we need to remember that the rider’s centre of gravity isn’t directly over the BB, that’s just where your feet happen to be. So on our YT Jeffsy example, 5mm can actually make a big difference.
There are practical limitations to having dramatically different rear ends too, as increasing the chainstay length also increases the travel, which changes the leverage rate of the suspension. Then there are the cost implications; manufacturing four or five different rear ends – one for each frame size – is considerably more expensive than a one-size-fits-all approach. Not to mention the logistical problems with size-specific rear ends, like making sure the correct rear end is attached to the appropriate front end, and that goes for hardtails too. So it’s easy to see why most manufacturers shy away from size specific rear ends. But not all.
In fact, it’s the complexity of the problem, that makes Norco’s Gravity Tune geometry such an elegant engineering solution. The brain child of Owen Pemberton (founder of Forbidden Bikes), and first developed for the Norco Aurum downhill bike, Gravity Tune geometry changes the horizontal position of the BB in the front triangle to manipulate the rear centre measurement. And the real beauty of Gravity Tune is that seeing as manufacturers have to build every individual front end for each frame size anyway, there are no additional costs for tooling or moulds. Also, the assembly factory is less likely to mess things up, because all frame sizes still use the same rear end, even if they benefit from different rear centre measurements.
Elegant as Norco’s solution is, it’s not the only approach. Mondraker is best known for its Forward Geometry, but its lesser known rearward geometry is every bit as important to handling. By using inserts in the rear dropouts it can change the rear centre by 10mm. On the new SuperFoxy 29, that means you have the choice of a 440mm or 450mm chainstay length to balance handling. An added bonus of this adjustable approach is that you’re not locked into the manufacturer’s pre-prescribed idea of what preferred weight distribution is.

Head angle
It wasn’t that long ago that you could guess, with a reasonable degree for accuracy, the intended use of a bike by simply looking at the head angle. Yes, there were outliers but, as a rule of thumb, head angles and intended use were closely correlated: 64º for downhill, 66º for enduro/all-mountain, 68º for trail riding and 70º for XC.
That’s certainly not the case today. Not only have bikes got slacker, the range has narrowed considerably, with 120mm travel ‘down country’ XC bikes sporting sub-66º head angles and the best enduro bikes giving DH rigs a run for their money. As such, travel is now the key differentiator between modern bikes.
And slacker head angles don’t just change the steering dynamics of a bike; they also increase the front centre, which influences the weight distribution. If you slacken the head angle by two degrees on a trail bike with a 150mm travel fork, the front centre grows by approximately 20mm. And it’s this move to slacker head angles, combined with a year-on-year increase in reach measurements, that has seen front centre measurements on all bikes grow disproportionally longer than the rear ends.
To see that in action we need only look at the evolution of a classic trail bike like the Orange Five. In 2013, the Five had a 67.2º head angle with a corresponding front centre measurement of 714mm. And let’s not forget, the Five was one of the most progressive trail bikes at that time. Fast-forward to 2020, and the head angle on equivalent size Five 275 is now 65º, the front centre stretching to 784mm. That’s an increase of 60mm, approximately 20mm from the slacker head angle and 40mm from the increased reach.
But it’s not the whole story. If we also look at the chainstay length we see that it has grown by just 7mm. Now, you could argue that the original Five was too short at the front and had two much of a forward weight bias, but we’re convinced that one of the key reasons behind the growing trend for shorter offset forks, is a reaction to the disproportionate increase in the front centre relative to rear centre. So if you find it harder to load the front end around flat corners, or tight switchback turns, on your modern trail bike, maybe it isn’t because the front end is too long; it could simply be that the rear end is too short.

Seat angle
It there’s one measurement that really locks in your seated riding position, it’s the seat tube angle. On geometry charts it is often referred to simply as seat angle, which can lead to confusion, as it has nothing to do with the tilt of the saddle. When we refer to seat angle in the context of geometry, we actually mean the angle of the seat tube relative to the ground. Or, to be more specific, the portion of the seat tube that the seat post inserts into. And while this subtle distinction sounds trivial, it’s actually really important as most modern mountain bikes don’t have uninterrupted seat tubes that run directly from the seat collar to the bottom bracket shell.
So how do we measure the seat angle when we don’t have a traditional, straight seat tube? We use the effective seat angle, taken from an imaginary line drawn from the BB centre to the head of the seat post or, in some cases, the seat post collar. No doubt, you can see the inherent problem already? With no agreement, or a standardised approach for measuring effective seat angle (even if it should change for different frame sizes), you have to question its value. Especially when many brands quote the same effective seat angle across an entire size range, which is clearly wrong, because lower saddle heights give steeper effective seat angles, while taller saddle positions result in slacker angles.
Dale McMullan from Nukeproof has studied the effects of seat angle on rider position in more detail than most. And by looking specifically at how far the saddle moves horizontally in relation to the bottom bracket – let’s call it saddle offset – the results for differences in the tallest and shortest riders are striking. Specifically, the saddle offset for a 6ft 4in rider on a bike with a 72º seat angle can be as much as 250mm behind the BB shell. Now, given that the difference in saddle offset between the tallest and shortest rider can easily be in excess 100mm, the fore-aft adjustment available on saddle rails clearly isn’t enough to compensate for the disparity. It also begs the question, if a 10mm shift in chainstay length is really enough to compensate for this massive shift in seated rider weight across the entire size range.
And if chainstay lengths don’t grow dramatically to accommodate the rearward weight shift of the tallest riders, maybe the easiest solution is to steepen the seat angles on progressively bigger frame sizes, just like the way Norco integrated the increase in rear centre measurement into the front triangle. And that’s exactly what brands like Nukeproof are starting to do. Yes, there are limits on how steep the seat angle can get, both in terms of pedalling dynamics and fit, but with progressively longer front ends, there’s never been a better opportunity to get a balanced ride feel across the entire size range.

Reach and top tube
To stop this feature ballooning out of all proportion, we’ve bundled the reach measurement and effective (horizontal) top tube length together as they are the key ways to compare bike sizing.
Of the two, reach gives us the most accurate indication of the actual space available in the frame, as it’s measured forward of the bottom bracket and independent of the seat angle. Contrast that with effective top tube length, where it is clear that a slacker seat angle will increase the effective top tube measurement, even though the true size of the frame hasn’t changed. It’s why the effective top tube length is more indicative of fit than sizing.
It’s still a useful yardstick though, and by looking at both measurements together we can garner a more complete picture of the effective seat angle. Let’s say we are comparing two bikes with similar reach measurements and effective seat angles. Now, we’ve already discussed how there’s no standardised approach to measure seat angle, so we need to take any quoted numbers with a massive pinch of salt. This is where the effective top tube measurement comes in handy. If both bikes have the same reach, the one with longer effective top tube is guaranteed to have a slacker seat angle, even if both manufactures list similar numbers.
But even when armed with the reach and effective top tube measurements, comparing bike sizing can be really tricky, as other aspects of the geometry can impact sizing. This was really brought home to me when I tested two different prototype rear ends with Specialized when it was developing the bridgeless rear ends for the Stumpjumper 29 in 2014. I started off on the stock bike, and every time the engineer bolted on a shorter rear end, the bike felt smaller. Now, bear in mind, the distance between the saddle, bottom bracket and handlebar did not change as those measurements are locked in place by the front triangle. I remember mentioning this to the engineer with some reservation, as it seemed so dumb at the time, but later it became obvious that as the rear end got shorter I simply moved my weight forward to compensate, which in turn made the front end seem shorter. And you don’t need a custom rear end to change how the size of a bike feel, simply fitting a wider handlebar is enough to make any bike feel bigger.
Putting it all together
Taking a reductionist approach to bike geometry can really help us understand how all of the individual aspects affect weight distribution and ultimately handling. It also highlights the complex interplay between all of the elements that go into frame design, and it’s this interconnectivity that makes putting it together all the more tricky. And to highlight just how tricky it can be, I remember having a conversation with Tracy Moseley about the Trek Slash 29. Tracy was convinced that the BB height was too low on the Slash 29 because she was constantly hitting pedals on the ground. But I’d tested that bike, measured the travel and geometry, and knew that it wasn’t the case. When I asked Tracy specifically when she was clipping her pedals she instantly replied that it was when climbing. And that’s when the penny dropped. It wasn’t that the BB height was too low, it was that the seat angle was simply too slack. So when Tracey started to climb, her weight was further back than it should have been, the slacker seat angle also increasing the leverage on the suspension, resulting in increased rear suspension sag and pedal strikes.
>>> How to change your mountain bike’s geometry
So while it’s necessary to understand all of the component parts that make up bike geometry, you can’t look at one number in isolation as every aspect of geometry impacts the other. Factor in suspension set-up, riders with different limb lengths and the dynamic nature of mountain biking and it gets even more complex. Still, armed with this basic understanding of how geometry impacts weight distribution we can start to go about changing it. And that’s exactly what we’re going to show you how to do next month. From something as simple as changing your handlebar height, to more complex geometry hacks like fitting offset shock bushings, or running mixed wheel sizes, we’ll walk you though all of the ways to adjust your bike geometry and unlock you bike’s full potential.