Mountain bike geometry explained in 9 measurements
From top tube length to bottom bracket height, mountain bike geometry can reveal plenty about how a bike will ride and whether or not it will fit you.
Read more: Best deals on mountain bikes and ebikes
Mountain bike geometry explained in 9 numbers

1. Seat angle
This is the angle of the seat tube relative to the ground. As the name suggests, actual seat angle refers to the lay-back of the seat post, but on modern suspension bikes this is complicated by the seat tube starting forward of the bottom bracket, to accomodate shocks and give rear wheel clearance at full travel. Effective, or virtual seat angle tries to take account of this, and uses a line drawn through the centre of the bottom bracket to the centre of the seat post. It is always steeper than the actual seat angle. The problem is with this measurement is that manufacturers don’t always tell you at which point on the seat post they measure to. Some use the point at which the seat post intersects a horizontal line drawn from the top of the head tube. Others take an average saddle height depending on the size of the frame. We measure all of our test bikes and give you both measurements. And we measure the effective seat angle using the saddle height of the test rider. Modern bikes favour steeper angles that put the saddle directly over the bottom bracket, making pedalling easier and more efficient. Putting your centre of gravity further forward also helps with climbing, making it harder for the front wheel to lift or wander around. An angle in the low 70s is good. Mid-70s is better.
Looking for great deals? Check out Chain Reaction Cycles’ latest clearance offers

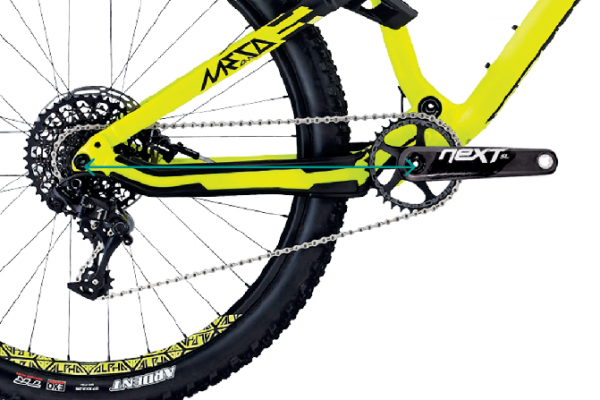
2. Bottom bracket height
The distance from the centre of the bottom bracket to the ground. A low BB makes a bike more stable by lowering your centre of gravity and bringing it closer to the contact patch of the tyre. Too low though and you might start clipping your pedals on things. So how low is low? Long-travel full-sussers have higher static (unsagged) BBs to accommodate all that potential movement so it’s hard to pin an ideal consistent number with full sussers, but hardtails can go as low as 300mm.
3. Chainstay length
Or, more accurately, the rear centre. This is the horizontal measurement between the centre of the rear wheel and the centre of the BB. Short back ends aren’t necessarily a good thing because they make a bike loop out more easily on climbs and, contrary to popular belief, don’t really help it to corner. Short chainstays can make a bike easier to get the front end up, which is both a good and bad thing depending on what you want to do.
It’s a complicated issue, but together with the front centre, the chainstay length determines where you are on the bike (central, further back, further forward). There’s no right or wrong here, but greater length can help a bike to feel more stable descending, and also help keep the front end down when climbing. As a rough guide, 430mm-450mm is the norm on 29ers, 425mm-435mm on 27.5in bikes.

4. Wheelbase
Add the chainstay and front centre measurements together to get the wheelbase. All other things being equal, longer bikes are more stable at speed. Anything approaching 1,300mm in size large is a long bike. Wheelbases are generally getting longer on modern bikes as there doesn’t seem to be much of a drawback. Long bikes can still get round tight corners, sometimes even better than shorter bikes can.

5. Reach
This is a hard one to measure, because you need a plumbline to do it well. Reach is the horizontal distance between the top of the head tube centre and an imaginary vertical line that runs though the BB centre.
It’s useful for sizing because it eliminates the variation in seat tube angles and isn’t affected by wheel size. It’s not perfect though, because the length of the head tube and head angle can skew the measurement. Most manufacturers list reach, so you can compare one bike to another. On a size large, 480mm upwards is a decent size, with XL frames going to over 500mm.

6. Top tube
We measure the ‘effective’ top tube, which is from the top of head tube centre to the seatpost centre, measured horizontally. This is more informative than the actual distance along the top tube. Either way, though, top tube measurements are pretty unreliable for bike fitting because seat angles vary from bike to bike. The down tube or reach are much better measures.

7. Head angle
The angle between the ground and the head tube (and therefore the fork) is important because slack angles, where the fork is raked out and closer to being parallel to the ground, slow down a bike’s steering response but make descending easier. Steeper angles can make a bike feel nippier on flat terrain but it’s often a bit of an illusion.
As a general rule, you can expect trail bikes to have 64-66° head angles, XC bikes too have higher angles, enduro bikes around 63° and downhill rigs in the low 60s. It’s worth noting, though, that 29ers tend to have steeper head angles than 27.5in bikes and/or they have forks with different fork offset numbers.

8. Front centre
This is the distance from the centre of the front axle to the middle of the BB. Two very disparate bikes can arrive at the same figure — a short frame with a slack head angle could be identical to a longer frame with a steeper head angle — but the fit and handling would be very different. 780mm+ is long on a size large but it does depend on travel and wheel size.

9. Down tube
The down tube measurement is an effective tool for working out a bike’s true size and whether it will fit you. If you’re buying a new bike, measure the old one from the centre of the BB to the bottom of the head tube, right in the middle. Just be careful if your new bike has a different wheel size to your current one, as the numbers won’t correlate.