Conquer steeper trails

Words by Andy Barlow | Dirt School
How to do steep. As long as you can follow a few simple principles you’ll be at the bottom and thinking about the next section in no time.
>>> The best mountain bike disc brakes
Summer is here, the trails are drying out, and all the gnarly, challenging features are begging you to go faster. Over the next couple of episodes we’re going to break steeper more natural trails down into neutralising your body weight for larger or steeper features, then look at changing direction and how you should balance. This month we’re going to build on the neutral body position from last month and give you specific shapes, techniques and control mechanisms that will allow you to ride difficult trails safely and with confidence this summer.

Notice how Andy’s hips are behind his saddle but his arms are still bent. This will allow him to stay neutral instead of being pulled forwards as his front wheel drops. Even on a steep trail like this you want to keep your elbows bent.
Allowing for movement
The key to feeling confident on steeper more natural trails is allowing your bike to move underneath you while keeping your body weight neutral and under control. This will let you to stay balanced and to find traction where you need it. It will also allow you to back off allowing for fluidity where the features get punchy. As soon as you run out of range of motion the trail will start pushing you around. Remember to stay close to your bike for maximum movement in any direction. Really concentrating on your neutral riding position on steep trails will afford you so much more control that you’ll be able to push your riding without feeling like you’re being exposed to any more risk. You have to stay on top of it though, so keep resetting back to your aggressive body position whenever you get a chance.
Staying low not back
A good way of thinking about this is to allow your hips to go behind your saddle whilst keeping your head over your bars and stem. Your bike will be pointing down the hill so your front wheel will be lower than your rear, but your attack position should remain the same as if you were on level ground. Allowing your hips to go behind the saddle means that your elbows will still have a bend in them and you’ll be able to absorb the impact of features, or have the range to push your front wheel into holes that open up in front of you. Either way, as soon as you lock your arms out you’re out of movement and it will only be a matter of time till your front wheel is dragging you with it. Keep those elbows bent as much as you can and you’ll have way more control.
Balancing gravity
Occasionally a trail will become so steep that you’re barely able to ride it. In these areas you’re not going to be able to do anything other than hang on and ski your way down with your back wheel locked. Whatever speed you carry into a section like this will remain with you till it mellows out a bit, so remember to slow down beforehand while you still have the traction available. The best you can hope for once you enter a section like this is that your speed will remain constant. You’re not going to be able to stop. Instead try and keep your cool and just be patient that it won’t last forever. Once the trail mellows out again, or even makes a turn so you’re on a traverse, you’ll be able to stop. Until then just go with it.
Grip points
Remember to look for the grip. As long as you’re close to your bike and you have plenty of room to move you’ll be able to let your bike roll over some huge features and keep a neutral, balanced stance. This neutrality will allow you to push with your arms and legs where you can see that you have grip, and generate traction from applying pressure where you can trust it. We call these grip points. They’re basically the smoother patches of ground that lie between all the aggressive stuff. You want to get into the mindset of linking these all together. Once you get into the habit of using them then you’ll be actively looking for them on every trail. Start low and push on the smooth parts. That way you’ll be lighter or even off the ground on the rougher parts.

A subtle shift backwards in your position, and a strong push with the legs, is often enough to neutralise a drop. If the drop is bigger you’ll need a larger range of motion.
Staying neutral
We’ll go into a lot more detail next month, but in a nutshell you’re trying to line your body up with the front end of your bike. If the bike breaks traction and ends up sideways, you want to keep a neutral riding position and allow for the moment from below your waist with your hips and knees. Your head should stay in the middle of your bars as much as you can manage. Look for examples of this in modern riding by watching any round of the Downhill World Cup or Enduro World Series race from the last few years. All the top riders have a confident stance on the bike that is unmistakable. Think Sam Hill, Danny Hart, Aaron Gwin or Katy Winton. All of them make the same shape when they come in to technical sections.

Here Andy tackles a tree stump right in the middle of the trail. His weight is back, but he’s still left enough bend in his elbows that as his bike moves underneath him he can still retain a neutral, balanced posture.
Rolling drops
If you’re wanting to stay on the ground, or if there is more than one drop coming at you, then you’ll want to roll off and stay neutral. The best way of doing this is to open up movement on the way in. Get your head as close to the bars as you an so that you can maximise your range of motion. That way as the front wheel rolls off and into the hole in front of you, you’ll be able to fill the gap with your arms. At this point your hips will be behind the saddle, but you weight should feel neutral and balanced. As soon as your back wheel is over the drop reset back to your aggressive, low position, and you’ll be set up for the next one.
Faster drops
Once you’re up to speed it’s much safer to land with both your wheels at the same time. In order to set up for this you’re going to have to get closer to your bike. Start with your regular riding position, but bend your arms and your legs so your body is way closer and your back is parallel with your top tube. As you approach the drop throw your bike forwards like a manual so that your arms are fully extended and your legs are able to drive your bike forwards by keeping your heels down. This will unweight your front end momentarily allowing you to clear the obstacle and land both wheels at the same time. As you come in to land remember to get back in to your attack position so you can apply an even weight distribution to your bike. If your weight is still back you’ll end up looping out. Land even and you’ll have a huge amount of control.

The majority of lift comes from how hard you push into the ground on the approach to the jump, rather than pulling on the bars.
Gaps
A great way of avoiding roots, rocks and rougher features is to jump right over them. You’ll need the speed to clear the obstacle to be able to ride out on the other side. If everything lines up though, and you’re feeling confident, then it’s on. Put in a huge push with your legs so that you can generate all the lift that you need on the take off. The more work you can do on the ground, the less you will have to do in the air, and the smoother it will feel. This will only really work on mellower gradients because as soon as your wheels are off the ground you’ll be in free fall, so pick your gaps, but being able to link sections of trail together by jumping them is so satisfying that once you get the hang of it you’ll be looking for them everywhere. Remember, you’re not trying to lift your bike over something rough. You’re trying to link the two smooth bits either side together. Go heavy with a huge push on the approach and you’ll generate stability allowing you to stay in control.
Having feedback on your own technique is the best way of completing the feedback loop and making changes to your own technique.
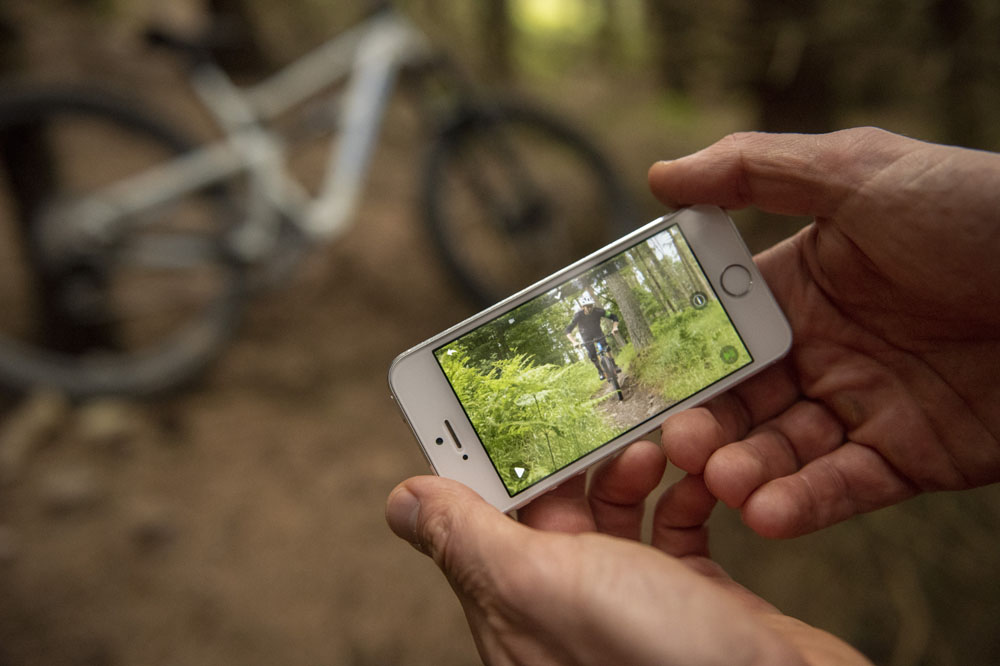
Feedback
The best way of getting feedback on what you’re doing is to be able to watch yourself ride. You probably have a good enough idea of what it should look like but trust us, you probably look nothing like that when you’re on the edge of your limit. Get a friend to film you and watch it back. It might surprise you how much more range of motion you have available to you or how much lower you can go. If you want to compare yourself to examples you can download the Dirt School app, but even just having a friend point their phone at you will give you something to work on.

Sessioning a technical trail is really the only way to improve. You need to know what you’re trying to achieve first though, so stop on something challenging and pull it apart.
Practise!
Sessioning a technical trail is really the only way of practicing your technique. You need the first run to just learn where everything is and how the conditions are that day. Your second run will be where you consciously apply a technique. Remember to slow down so you can deliberately focus on something. Your third and fourth will be where you can start correcting mistakes and getting it right. Only after that can you start getting up to speed again — only this time with a much better technique.