Nice try Nico and co.
Snowy edit from Hope Tech media squadron featuring Nico Vink, Makken and Vinny T gets its stoke on. Snowboating anyone?
How to keep riding through winter
Your favourite summer trails will soon dissolve into soggy stretches of singletrack so follow our guide to maximise fun in the murk of winter.
By Andy Barlow of Dirt School | Download the free Dirt School app: Google Play | iTunes Apps
It’s getting to that time of year again where the evenings are shorter, the trails are soggier, and your kit is taking longer to dry. We might have a few weeks of good weather left if we’re lucky, but now is the time to be turning your attention to focussing on your technique. After all, all those trails that have been fairly straight forward for the last few months are about to get very difficult again, so finding grip by deliberately looking for it is going to be the key to making progress.
>>> Nine reasons to ride in mud
This month we’re going to look at natural trails and how to tame them. We’ll show you how to prepare for a loss of traction, how to get more grip from the areas you can trust, and what you should be thinking about when the trails are slippery.
Everybody
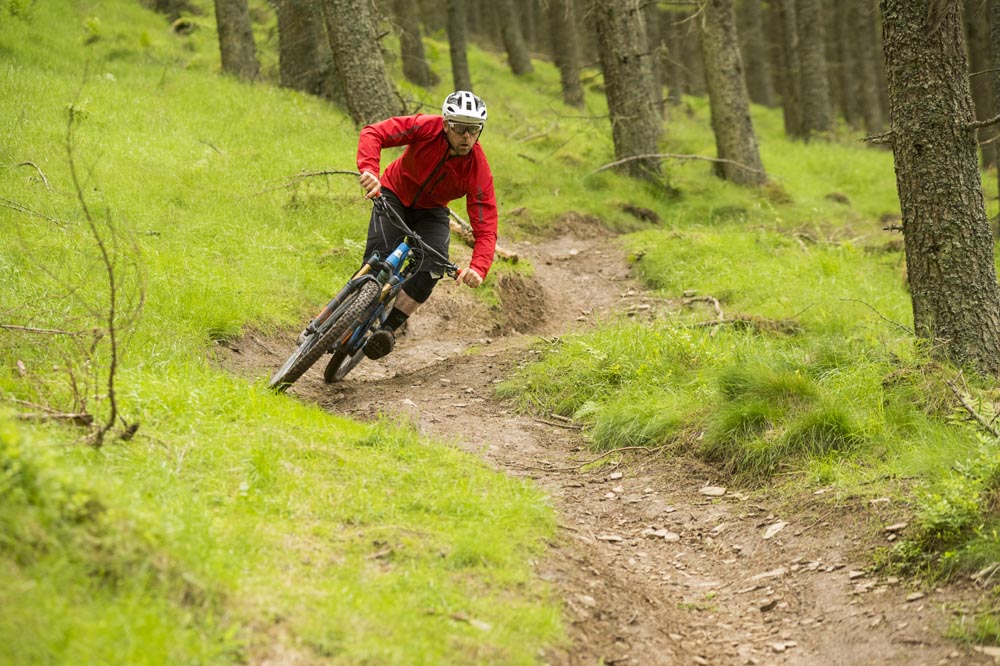
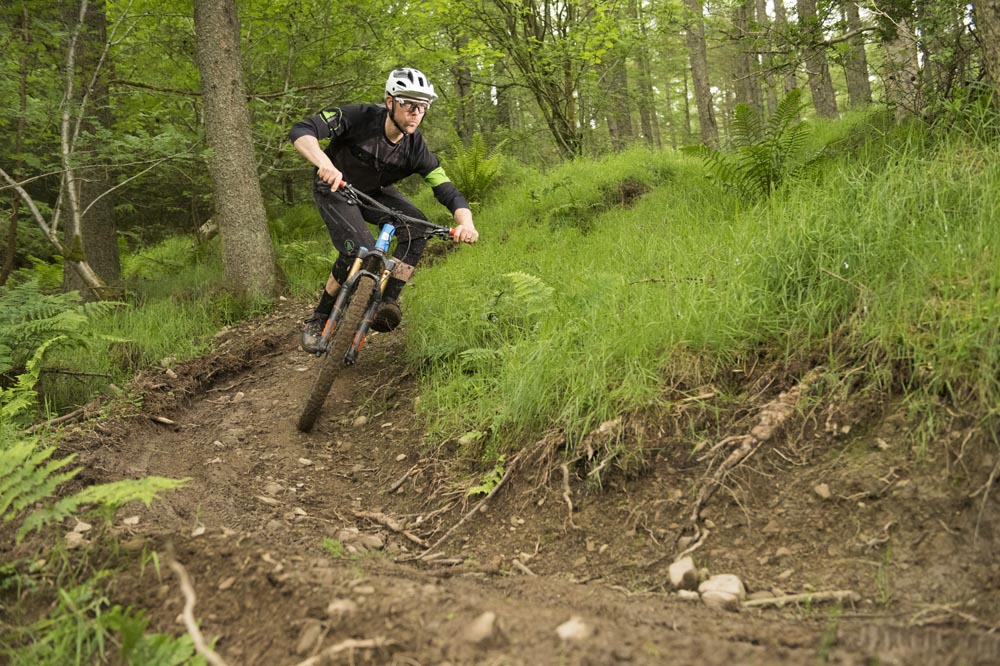
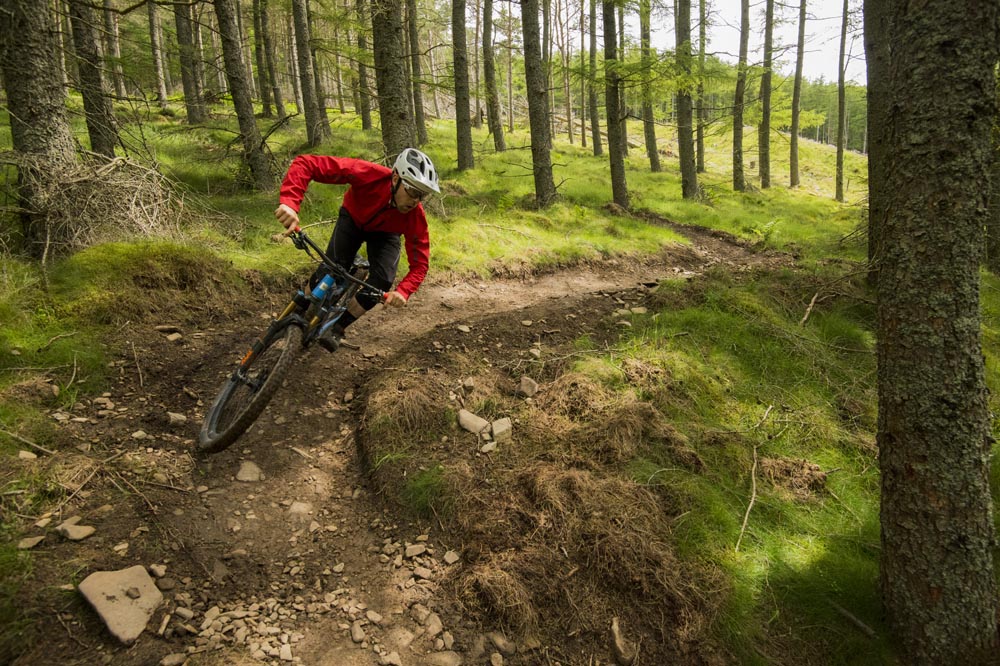
When we watch clients ride at the start of a session we’re basically looking for two things. Firstly, do you look like you’re riding on top of your bike? Or do you look like you’re part of it? And secondly, do you pull for control or push for it? Any confident, experienced rider will have a certain flow to their riding that looks like they are part of the bike and trail. This is because they have loads of room to move and they are pushing all their weight directly in to the trail for control. They’re squashing their suspension and creating pressure that gives them predictable, consistent grip. Hence why it looks like they are part of the trail.
Get involved
Most riders stand on top of their bikes with their arms so straight that they will never have any range of motion to control the front end should it do something that they didn’t expect. Remember that you want have your back pretty much parallel with your top tube, your head over your stem and bars, and your elbows bent so that you have loads of room to move. This way you’ll feel like you have room to move and not just get pulled anywhere your front wheel does. When you’re between obstacles or sections remember to snap back in to this shape with your legs straight and your heels down. Your neutral riding position is your best form of defence.
Let go
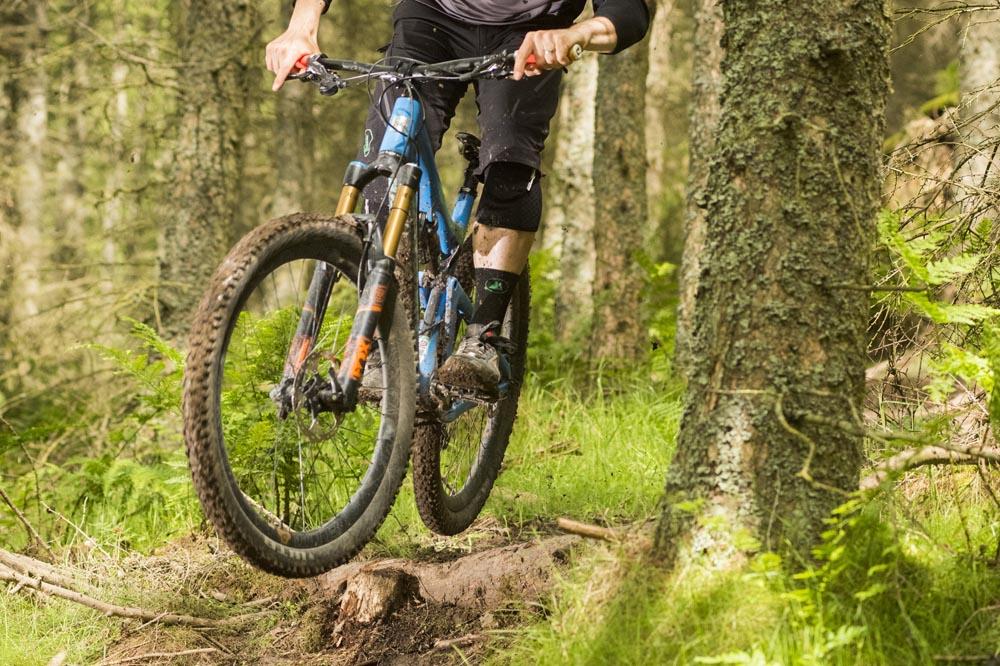
Once you start getting used to being closer to your bike you can really start letting it slide about beneath you without it throwing your balance off. You’ll have so much room to move that you’ll be able to handle really quite large slides and bucks without it having any affect on you. Remember that you’re trying to keep your head, shoulders and arms in your neutral riding position above your bars and front end, and try and resist keeping your weight back as it will just restrict how much room you have to play around with. After every large movement try and centre your body position again by focussing on your shoulders and arms keeping your head neutral.
Push it
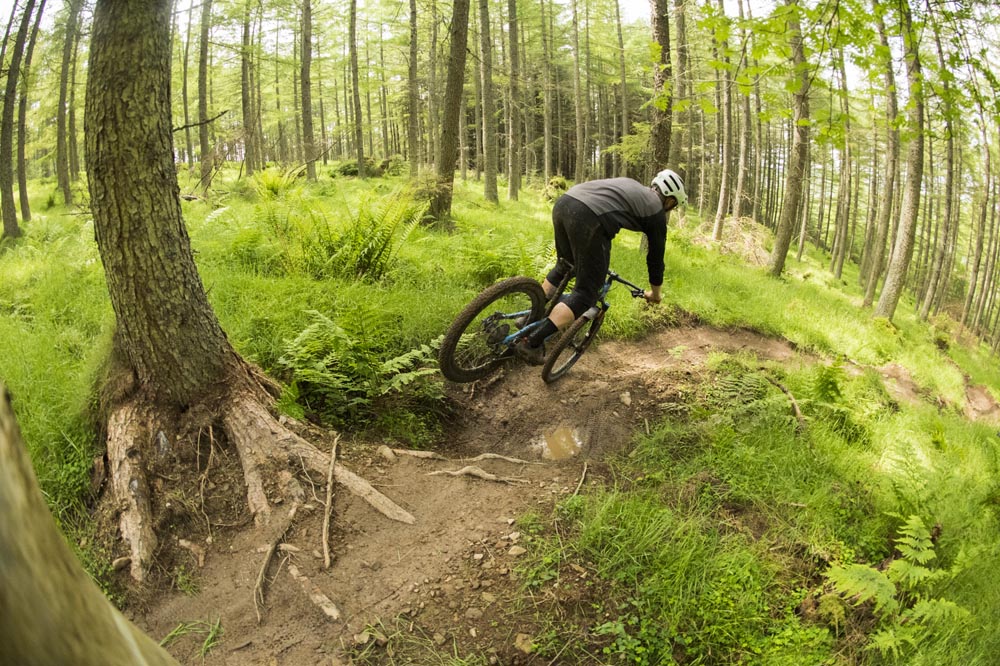
The idea here has more in common with skiing than any other form of cycling. Watch a skier and you’ll notice that they are heavy when they turn and light on the exits. This is because they’re applying pressure to the slopes where they need control. You’re trying to create that same pressure on the trail in places where you know you can trust the grip. You’ll do this by starting off low with your legs bent and your body low on the bike, then as you push gradually and firmly with your legs and arms you’ll be able to force all your weight through the bike on to the ground. If you time it right you’ll be pushing away from the trail and going light into the air just as it gets rough under your wheels, and your weight will return to the trail again once you’re back onto something smooth again. You don’t have to clear the rough stuff entirely, just enough that you’re heavy and light in the right places.
Grip points
Look for the places where you know you’re going to have grip and aim for them. You eyes should be dancing down the trail ahead of you looking for all the positives. Not seeing all the slippery bits, big obstacles and massive exposure! If you’re consciously looking the grip points then you’ll not even notice the negative features all around you. You’ll be confidently linking one solid, consistent grippy bit to another.
Go for flow
Any trail has undulations on it. Slight ups and downs that you can use to exaggerate all the weight that you’re putting back in. You don’t want to absorb the features here. Instead try going passive as you pass over something sticking out of the trail, letting the trail push your arms and legs out of the way, then go deliberately heavy by straightening your legs and creating a push at the bottom of the lowest point. If there are puddles on the trail then you’re basically wanting to push through them. Not only will you create stability through the otherwise unstable part, you’ll create a burst of speed through pumping them. If the feature is larger or goes on for longer then just push slower. You don’t need to push all at once in the middle of the feature. Be more like a skier and make smooth carves down the slope.
Bunny hops
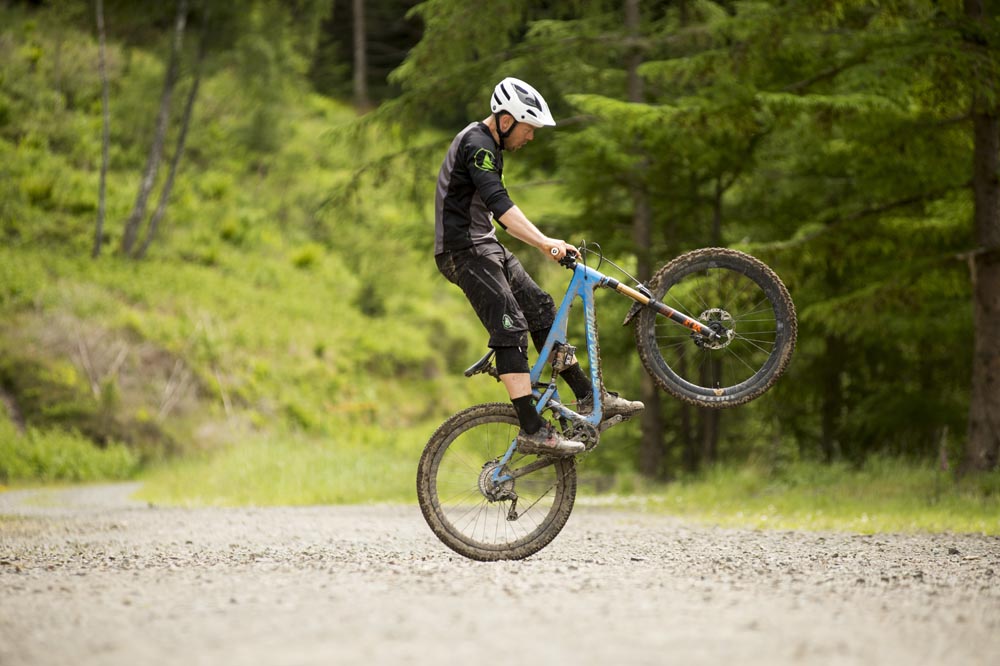
The core skill at the centre of all this weight management is the bunny hop. If you can push away from the ground properly then you’ll be able to generate the pressure for grip, then the lightness to clear the rough bits. It’s all in how you push away from the ground. Have a friend film you and watch how much of your hop is push and how much of it is pull in the air. For most riders this is 50/50. 50% of the hop is push, and 50% is pull. You want to turn those figures around so that more like 80 or 90% of your hop is push, and only 10 or 20% of your hop is pull. The more you can push the better and more useful you’ll find your bunny hops are.
Angulation
This is basically a phrase for first of all balancing with your hips, and deliberately aiming them in a direction that you want to go in. Your top half should always be kept calm and centred, so you’re going to have to loosen up your lower half to make all the small movements that will aid your balance. If you can see a grippy bit of the trail coming that will allow you to change direction, try twisting your hips and knees slightly in the direction you want to go in. That way when you push you’ll already be facing the way you want to go rather than still going straight. Think of it as lining up with a part of the trail that is ahead of you rather than being lined up with a part of the trail that is now behind you.
Braking
When things get steep you’re always trying to find a balance between being off the brakes for traction, and braking so that the amplified effects of gravity don’t get away from you. This can be tricky at times, but try and remember to brake where you have grip and to let go, even if with just your front brake, when you are on ground that you don’t trust. Slamming your brakes on because you’re scared doesn’t work here. You have to plan for the tricky bits by deliberately slowing down before hand. That way you can be in control where you need to be.
Sessioning
This is something that if you don’t already do, you most defiantly want to get in to. Riding the same trail more than once is the best way of actually reflecting on what you previously did, then setting a goal for the next run. Take a really difficult section of corners and drops and stop after it, dump your bags, then push back up. You can film each other riding it, offer constructive criticism to one another, and have a chat about how each of you are thinking about getting over it. Even just watching a better ride going through and breaking it down is a great way of changing what you do yourself.
Purposeful practice
Remember that in order to make the best progress you want to have a specific goal in mind. This might be your body position, where you’re braking, or what you’re looking at, but have a plan and stick to it. Every time your mind wanders and you start loosing concentration, deliberately snap back to your plan. Body position is the biggest thing you can change for the least amount of effort or money. It will make a bigger difference than anything you can change on your bike. Go out there and (purposefully) practice.