Attack the splat
Don’t kill your full susser over winter. A cheaper winter hardtail for the colder months will help you keep riding and build up your technique too.
>>> The 10 best routes to do this winter
In this guide you’ll learn why many riders swear by a winter hardtail; to cut down on maintenance time, keep you out on the trails and even build up your skills. We’ll also go into what sort of hardtail and components you should be looking for.

Why not just keep riding your usual full suspension bike?
You can do. Especially if you ride somewhere that isn’t as blessed/cursed with mud as most places in the UK will be. But the basic idea of getting a spare winter hardtail is to prevent your full susser from getting worn out and all scratted up.
If your trails aren’t mudbaths the chances are the sheer amount of water spraying everywhere will take its toll on your bouncy pride and joy.
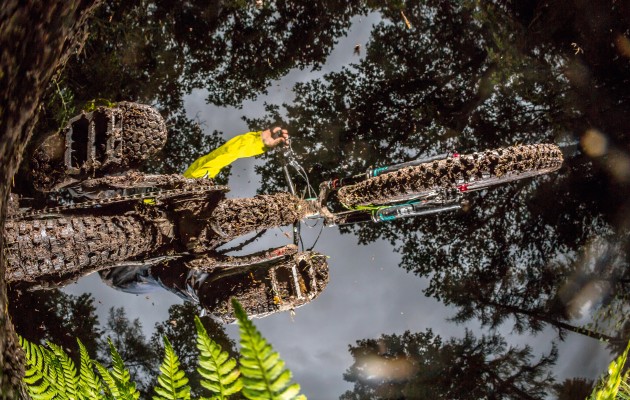
As well as protecting your full suspension bike from winter abuse, a hardtail can often be the better bike to ride anyway. They’re lighter, so easier to keep propelled in the slop. They don’t hold on to muck as much, so they’re easier to clean and don’t clog up mid-ride. And hardtails are arguably harder to ride so they can add spice to over familiar trails that can lose their attraction on a full susser in winter.
You don’t have to say goodbye to your full suspension bike for the whole of the winter. You’ll probably dig it out now and then for bigger day rides in certain locations, for example. You can use your winter hardtail for the majority of the rides you get out for though; night rides, local blasts, woodland thrashabouts, trail centre rips and such like.

What to look out for on a winter hardtail
You may well have an old bike (or frame-plus-bits) in your shed/cellar/hallway. Think long and hard about whether it’s going to be worth rebuilding it into a full bike.
If it’s a bike that’s a few years old, chances are you might simply find it too much of a handful. It may have a wheel size that your current bike doesn’t have. And/or it may sport old-fashioned geometry (short reach, steep head angle etc) that you aren’t used to any more. It may be wiser to let sleeping dogs lie and leave well alone (or donate the bike/bits to your nearest bike recycling charity outfit).
Buying second hand is another option. But again, just keep an eye on the age of the bike. Even bikes from more than a couple of years ago can be radically different to your main full suspension bike.
Aside from these caveats though, picking or speccing a winter hardtail is pretty simple. Here are the essentials…
- Lots of tyre clearance AKA mud clearance
- Full length gear outer cable
- Generous standover
- 30.9mm or bigger seat tube
- Aluminium frame
- 1x drivetrain
- Modern-ish geometry
- Tubeless-ready wheels

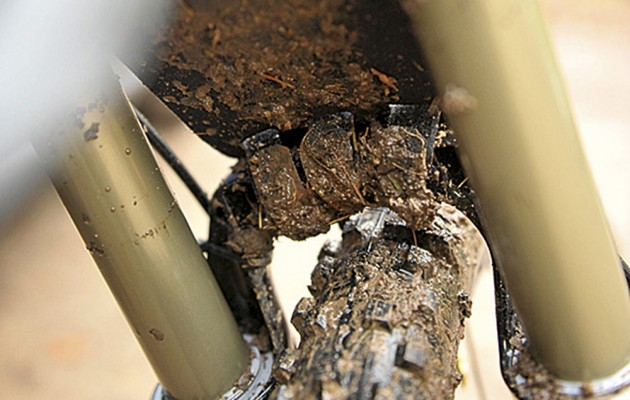
Tyre clearance – the frame needs to be able to take 2.5in tyres (which means it’ll accept 2.0-2.3 tyres with room for mud).
Full length gear outer – any exposed bits of inner gear cable are going to let filth into the cabling.
Generous standover – when riding in winter slip-n-slide it’s good to be able to slam that saddle and get loose.
30.9mm+ seat tube – so you can run a dropper post. See note on dropper posts below.
Aluminium frame – won’t rust like steel/cromo.
1x drivetrain – ditch the double (or even triple – remember them?)
Modern geometry – steep head angles and short top tubes suck. Anything steeper than 68° is a no-no.
Tubeless-ready wheels – punctures suck at the best of times. On winter rides they can be a ride-ruiner.
Recommended winter hardtails
Even though their remit isn’t specifically as winter hardtail hacks, the winning bikes in our Hardtail Of The Year test are all mighty fine for the job. And that’s definitely the best place to go first.

To dropper or not to dropper?
Dropper. Always.
This might sound like it flies in the face of the whole point of a winter hardtail ie. to protect delicate componentry. But riding without a dropper post just isn’t very much fun.
So either look out for a bike that has a dropper installed already, or budget for a new one (there are plenty of excellent sub-£200 droppers around now), or use the dropper of your full susser.
What you shouldn’t do with your dropper over winter is ignore it. Clean it after a ride. Keep the seals and shaft lubed. Get hold of some silicone spray to prevent the mud from adhering. Learn how to do a rudimentary re-lube job.
Maybe think about getting a dropper post mudguard, such as the £10 Pro Dropper Seatpost Protector.
Other bits and bobs to sort out
Mud tyres – never is tyre choice more important than in the winter. A good tyre can be the difference between having filthy fun and having a miserable ‘mare.
Mudguard – modern mudguards are both much more effective than they used to be AND better looking.
Wet lube – for most of the year it’s best to avoid wet lubes as they can attract dirt like glue but in the wet winter dry lubes just disappear after a couple of miles, leaving you with a noisy, mis-shifting drivetrain.
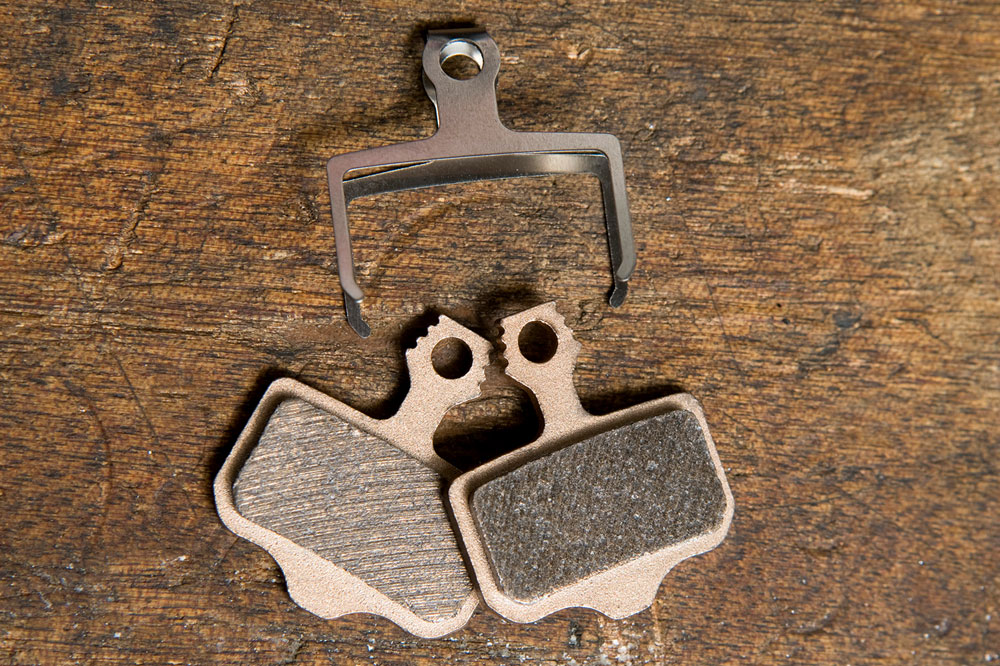
Sintered pads – sintered and metal pads can feel blunt and maybe even under-powered (at slower speeds mainly) but the trade-off is that they last a lot longer.
CO2 cartridges – a bit of quick-fix luxury is a real boon if you puncture during a winter ride. Get things back up to pressure and get back on your bike before your body chills down and your mates lose their patience!
How best to store your full suspension bike over winter
Most of the time you’ll be fine just to leave your full susser where it is. It is a mountain bike after all not a delicate flower. But if you want to take some measures to ensure it emerges in the spring requiring minimal work, here are some tips…
- Take the pedals off (simply to make it easier to stack up without the pedals jamming into adjacent things!)
- Loosen the stem and turn the bars 90° (as above)
- Turn it upside down, or store it vertically (to get the oil in the fork back up the upper seals)
- Clean out and re-grease the headset bearings
- Clean out and re-grease the BB axle
- WD40 the chain and then re-lube
- Extend the dropper post to full height
- Cover it with an old blanket or similar
Winter bikes aren’t just for roadies
Lots of people have a cheap hardtail that has been demoted to commuting or ‘spare’ duty. It’s normally pretty neglected, probably only gets the bare minimum of maintenance to keep us moving from A to B… and this is the time of year when it sees the most abuse!
We ride them to work and back, or down to the shops, then chuck them in the garage until next time. If something non-essential breaks, it normally stays that way until it can get a hand-me-down from the ‘proper’ bike that needs upgrading. It might even have some sensible mudguards and plenty of flashing lights.
There’s nothing wrong with this — a hardtail is easier going if you go on the roads to get around, and maintaining a commuter bike every day gets old very quickly. After all, it’s not like your bike is going to dissolve if you can only look at it once a week. But why not make the most of your ‘spare’ bike?
Don’t stop when the clocks go back
Having a bike that you can throw around in bad weather and muddy conditions can be the difference between getting a ride in and staying at home because you won’t have time to service your pride and joy in the dark after a muddy winter ride. Cheaper components and a frame that can take a couple of scratches mean that you can get a bit more adventurous all year round.
The extra hours on the bike while you’re riding for transport needn’t go to waste either. Work out some detours on your commute and keep your skills sharp. Riding down a set of steps is a great drill for steep and bumpy descents. Kerbs can become drop-offs or bunny hop practice, and grassy banks and corners can help your handling in wet conditions as well as help you find the grip off-camber.
Even if you can’t find some good off-road trails, sprint up the hills and work your wheelies into manuals on quiet stretches to make the most of your time.
Building control
In times gone by, people said that the only way to properly learn bike handling was to ride without suspension. This might not be true, but if you’re used to a full-sus bike out on the trails, doing some runs on a hardtail can be a great way to take yourself out of your comfort zone and really focus on handling.
Riding a hardtail from time to time can help you to learn where your weight should be on the rough stuff, as well as descending or jumping. You can also develop a more controlled feel for the apex in corners, and really feel the rewards of hitting it just right. Taking your now-beloved winter hardtail bike to a trail centre can mean you can get in some practice pumping the bike, and gain speed down small slopes, compressions and around berms.
Reading the terrain
Without a full-sus bike to rescue you, slight changes in your line can mean feeling a big difference in traction when sprinting on the flat or coming out of corners, and help you work on your body position and line choice coming into different sections. It’s all too easy to fall into the habit of following the sheep’s line on a full-sus!
At the same time, you’re forced to pay attention to where you’re putting your front wheel, as well as where your line will take you.
So why not mix things up a bit, take your winter hardtail down the trail centre and give it a thrashing? Build your skills, move out of your comfort zone, and spend less time worrying about the paint job of your summer bike. Break up the monotony of your winter commute and make the most of cycling when everyone else is in hibernation, and reap the benefits next season!