 Race Face Evolve problems
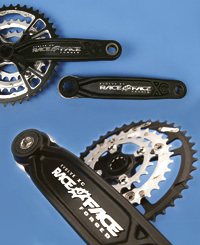
I have a Race Face Evolve XC crankset on my Giant Trance 2. I’ve had it for 2 years and have ridden it quite hard and, on a few occasions, in very muddy conditions.
Recently I have experienced the driveside crank becoming loose with movement in all directions. I have removed the driveside crank, cleaned and greased it and the axle spline. On replacing, I have tightened the 8mm screw up to the shoulder until there is no more movement. I also have to tighten the 10mm screw very tight to lessen the lateral movement in the driveside crankarm. By doing this, I do get a fit that does not give any movement in the driveside crankarm. This lasts for a few rides and then the movement in the driveside crankarm starts again, which necessitates the tightening process to be repeated.
Is this right? If not, what can I do to stop it repeatedly happening?
Best regards,
Dave Thomas, email
The fact that the movement can be removed from your crank set by re-tightening, suggests it is a problem with the fixing bolt working itself loose and thus allowing the crank arm to wobble. Stopping the bolt loosening is easy, a quick clean of the threads and some application of medium strength thread locking compound will ensure the 8mm cap head bolt remains tight. The 10mm crank arm cap acts as a “one key” release cap and such is not designed to prevent crank arm movement, that said by tightening up against the main 8mm fixing bolt it will help prevent this bolt from “backing off”. Because you have now had the crank arm come loose on a few occasions I think it would be wise to check the fit of the crank arm on the axle. This fit is supposed to be a tight interference fit not a loose slide fit .To check, first remove the 10mm cap (LH thread) and 8mm crank bolt. Next slide the crank arm onto the axle, the crank arm should become tight before touching the axle spacers, If it slides up to the spacers but doesn’t wobble your just at the end of the cranks usable life. If on the other hand it displays any sign of lateral or rotational movement on the axle splines when pushed up against the washers then the crank arm is scrap! Fixes such as epoxy glues, liquid metal or stud/ bearing fit only provide temporary solutions to a poorly fitting crank arm. The load on the crank and bb axle interface is quite large so any “play” in this area will become exaggerated very quickly. All crank sets regardless of brand rely on there being a very good fit between crank and axle with the fixing bolts are there just to ensure the crank doesn’t migrate from its intended location.
Hub offset
I am wondering if all MTB disk brake hubs are the same with regard to their position of the rotor mount?
The reason I ask is I have recently bought a Hope Moto M6 front brake and I can’t get the caliper to line up. The caliper mounting bracket and caliper is on its furthest position away from the disk, yet the disk is no way near the centre of the caliper opening, so rubs on one brake pad all the time, in fact the clearance is that little that the floating part of the rotor can actually rub up against the caliper mounting bracket!
It’s as if the rotors position is actually too close to the fork? (i.e. too far out from the centre of the hub) I have seen on the net “rotor shims” which I suppose are for when your rotor is sitting too far in towards the centre of the wheel (the opposite of my case)
Does anyone have any advice? I’m a little bit gutted that I’ve spent £144 an a brake system that doesn’t fit and don’t think I’d be able to send it back now it’s marked from catching the caliper etc. Gutted!
Jim Lakes, email
Jim – you’ve already answered the first part of your own question regarding disc hub differences by being aware there are spacer or shim kits available that compensate for this difference and assist by moving the rotor position relative to the hub centreline. The deference’s from hub to hub are usually quite minor, and the shim kits, as you point out, only allow you to increase the hub centre to disc centreline distance which in your case would exaggerate the problem. To get your brake to work correctly the calliper and bracket needs moving outward on the fork leg or the disc needs moving inwards. Even if you swopped hub brands it is unlikely that you disc position relative to your calliper will move more than 1 – 2mm, which may not be enough for the problem you describe. You could get your hubs disc fitting area skimmed but this is costly and may cause problems with calliper to spoke clearance. If we accept that your current wheel setup should be OK then we need to look at the calliper / fork setup. If your fork is on international standard disc brake tabs and not post mount , then it is possible to move the calliper “outwards” by facing the inside of the tabs. Only a minimal amount of material should be removed, so this is also unlikely to provide a significant improvement. For some brakes a thinner mounting bracket may re-position the calliper into a better spot, but as the hope requires a dedicated mount this would not be an option. What is most likely the cause of your problems is that you may be running Hopes dedicated heavy duty Freeride / DH brake on a fork not designed for such a brake or purpose. Freeride /DH forks require a bigger and stronger fork leg that will also be a greater diameter. Combine this with the assumption that such a fork would be running a larger front disc, then what you get is an increase in fork leg disc brake tab size, tab to disc distance and calliper mounting bracket thickness. So it is no surprise the brake designed specifically for Freeride/DH has fitment issues when used in conjunction with non Freeride /DH components. I’m afraid the only real option is to change the brake, if you would like to stay with Hope,a Mono 4 should fit the bill.
When eight becomes nine
Hi, I would like to change the front/rear mechs plus shifters from Shimano Deore to Shimano XT. My present setup is 24 speed with the front mech being top pull.
What with low/top normal rear mechs and rapid-fire shifters ect, what is the best combination to give a good clean gear shift.
I would also like to change the fork to a suspension unit, of which I have no knowledge at all.
The fork presently fitted is spinner triple butted cr-mo, with a Dia-Compe diatech threadless headset and the steerer tube is inch /eighth dia. The fork I purchase must be v brake enabled as I do not wish to change my brakes or front wheel. Do I have to change my headset, if so, which make and is it a workshop job? To sum up no doubt you will have noticed that its an old bike we are dealing with but it has done very little. The type of riding I do is for pleasure ie forest,canal,landrover and cycle tracks. I would be most grateful for any imformation you can give me on the purchase and fitting of these upgrades, especially the fork and headset. As my budget is in the region of £400/£500 would I be better putting this cash towards a new bike.
Jack Patterson, email
It would have been nice to know exactly how old and what brand and model your current bike is so that I could give you a more informed opinion to some of your questions! Anyway we’ll deal with the easy one first. Upgrading front mech ,rear derailleur and shifters from Deore to XT will certainly give performance benefits, buying the complete set as you propose will ensure the items work at maximum efficiency, whether you go for top normal (my choice) or low normal all comes down to personnel preference. Both setups will work very well. Unless you are hunting out older 24 speed XT, you must change your cassette and chain as well to match into your new 27 speed setup. Strictly speaking you should also change your chainset as the 8 speed rings you will currently be running are spaced differently and are thicker than the 9 speed rings used in conjunction with 27 speed XT, In practice the chain will usually run OK.
Changing the rigid fork to a suspension unit will not cause too many problems as your headset size and style is the same as the current standard. What will limit choice is fork length as you should try and match axle to crown length of the new fork to your existing fork so as not to upset the handling. Luckily V brake fitment is still available on lots of forks and has only really been phased out on higher end models were the assumption is that disc brakes will be used. If your headset feels tired and you do decide to change it opt for a sealed bearing type which cost as little as £20, if the budget will stretch a bit further look at the new Hope unit, this has been tweaked in design recently and now ranks as one of the best available . I would definitely recommend getting a competent mechanic to fit it.
The question about whether to upgrade or replace is always subjective and consequently difficult to answer. How good is the quality of your existing frame? Will other components such as wheels require replacing over the next few months? It’s no good spending £500 upgrading on a Second hand bike that can’t match the spec of a new £400 bike!!
Puncture Hell
Is everybody having the same problem or am I just damned unlucky, I am speaking of course about punctures. I have now had about 10 this winter alone, I have tried allsorts of stuff from sludge tyres to protective slime and I am still being plagued by this crazy affliction.
My bike runs on Panaracer Fire XC tyres and I really like them, the bike itself is a Scott Scale 40, I use it for commuting and also off road, I usually inflate them to about 55 – 60 PSI for the road and dont generally deflate them much for off road.
I understand that this time of the year that thorns and such are the main contributer, however I just wish people would be a bit more careful when disposing of items such as glass, as some of my punctures have been glass orientated.
I know that there are no particular fail safe resolutions to this problem but I would appreciate any kind of advice. Sorry that this sounds a bit like a ranting madman but this problem really gets my goat!
Paul, Blackburn
From the way your questions phrased it appears that you have traced the cause of your puncture woes back to foreign objects protruding through the carcass of your tyre. You have three courses of action available.
• Avoid riding over the offending items – in most situations its not very practical to dodge and weave your way around road and trial debris at 15mph never mind at the 35mph plus that your likely to be travelling at on the faster trials. Also a head down looking at the floor for thorns style has safety disadvantages compared to the usual head up, looking up the trail for bigger obstacles approach!
• Except that thorns and the like will pierce the tyre and tube but try and introduce something that will seal around the protruding item or the hole that remains while riding – liquid latex is usually the solution but you already state that you have tried the equivalent slime inner tubes without success.
• Present a tougher barrier to the thorns and glass – The simplest or most obvious solutions are usually the best. If the tyre carcass is tougher due to Kevlar reinforcement or better still tougher and thicker through the use of more rubber, then it becomes more unlikely that small thorns or glass will be able to force their way through the full depth of the tyres carcass thus preventing punctures.
The ultimate solution has to be a tubeless tyre setup with some Stans No Tubes solution or equivalent inside the tyre, you would be amazed at what this setup can cope with. We did this for a regular customer of Ride-On who was doing a sponsored ride in the Mexican desert. While the rest of the group fixed countless punctures every day, He just did a little tyre inflating, then threw away his cactus thorn infested tyres at the end of the trip!