Grip it and rip it. Train the deadlift to take your riding to the next level
Want to be a stronger, faster rider? Start deadlifting as part of your mountain bike fitness regime. Pedal harder for longer, hold a more solid riding position and take bigger impacts buckling.
>>> Get fit for riding with the help of our tailor-made fitness sessions
If there’s one strength exercise that really transfers to mountain biking, it’s the deadlift. And while most trainers agree that the squat is king for general strength development, take one look at a well-executed deadlift and you’ll instantly see why it has better crossover to riding.
And because the deadlift is a “functional” exercise, it emulates movement patterns you use in everyday life – so it will also make you a better-functioning human. That said, during training, you will be moving considerably more weight than when picking up your weekly shopping, so correct technique is essential for safety and effective progress. Follow our five-step set-up and watch your strength on and off the bike skyrocket.

How to: Deadlifts
The deadlift is one of the easiest exercises to coach, but if you’re doing it on your own you may find it difficult to “feel” where your body is, so use a mirror, film yourself from the side or ask a training buddy to help you get into the correct position for each step of the lift. Only move to the next step once you are confident you have mastered the previous one. It is vital to lift responsibly; it is easy to feel like you can lift more weight, but doing so can compromise your safety. So always warm up and start with lighter weights, even if you are an experienced lifter.
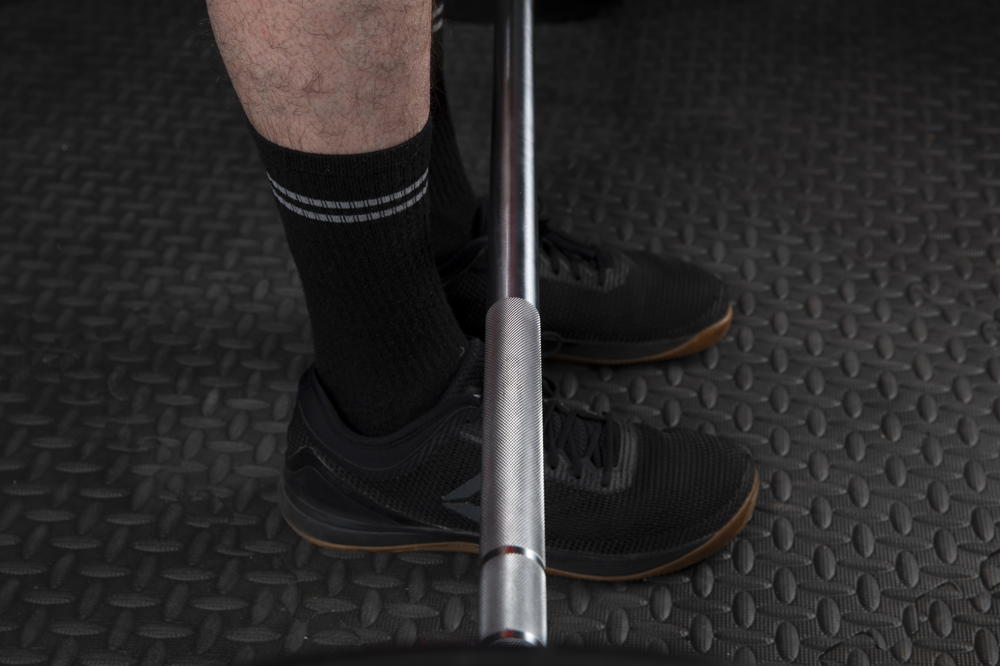
1. Foot position
Approach the loaded barbell and place the bar directly over your mid-foot. Stand up straight with your feet directly under your hips, feet pointing forward. The bar should be about an inch away from your shins. To ensure that the bar is at the correct height, use full-size 20in diameter Olympic weight plates.

2. Hip hinge
Before initiating any movement, brace your core by squeezing your obliques (the muscles either side of your tummy). Now slide your hands down the outside of your legs to your knees by changing the angle of your hips, not your spine. Keep your shins as vertical as possible at this stage. The purpose is to safely hinge at the hip without losing the neutral curve of your spine. It might help to think about pushing your hips back rather than bending forward.
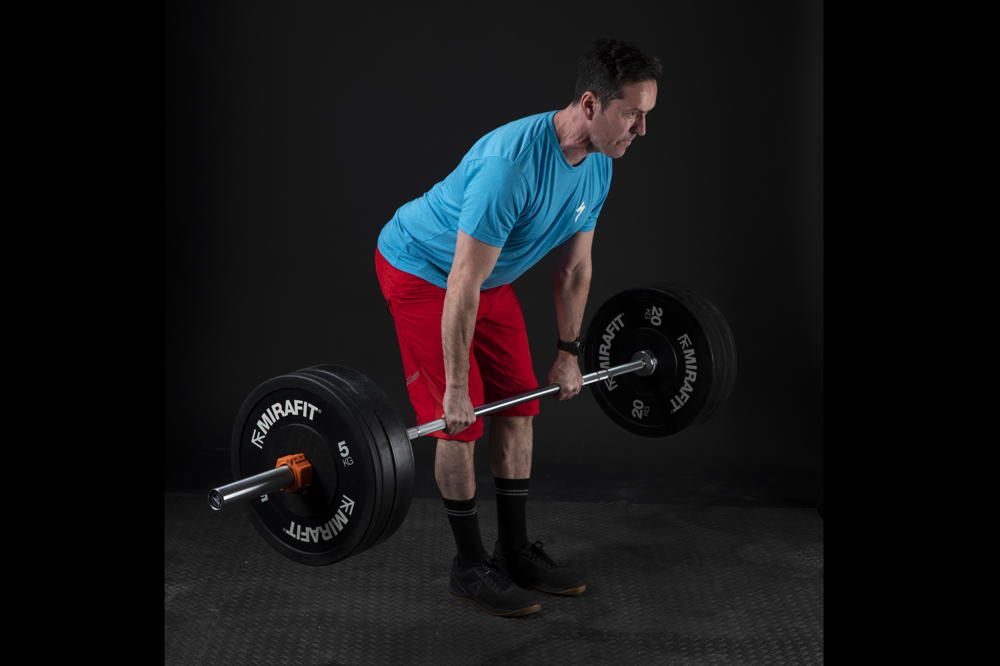
3. Grip the bar
Once you can do the hinge without your back rounding, bend your knees and continue to slide your hands down your legs until you can touch the bar. If this is difficult for you to achieve without rounding your spine, you’ll need the raise the height of the bar by setting the weights on pads or extra weight plates. You’ll also need to work on flexibility. With your shins touching the bar, grip the bar symmetrically, hands outside of your legs with both palms facing back.
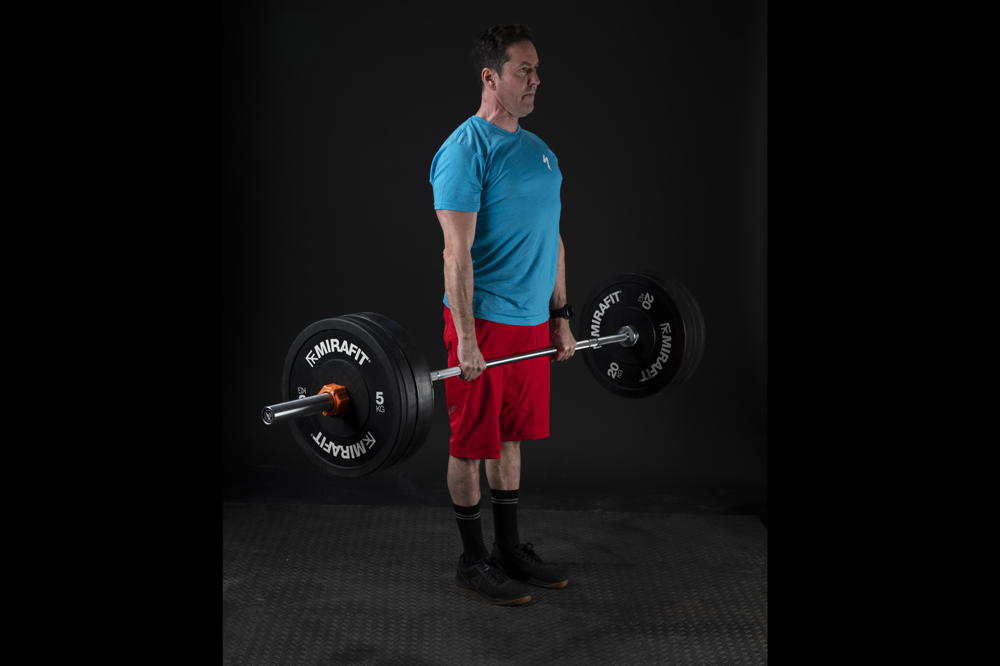
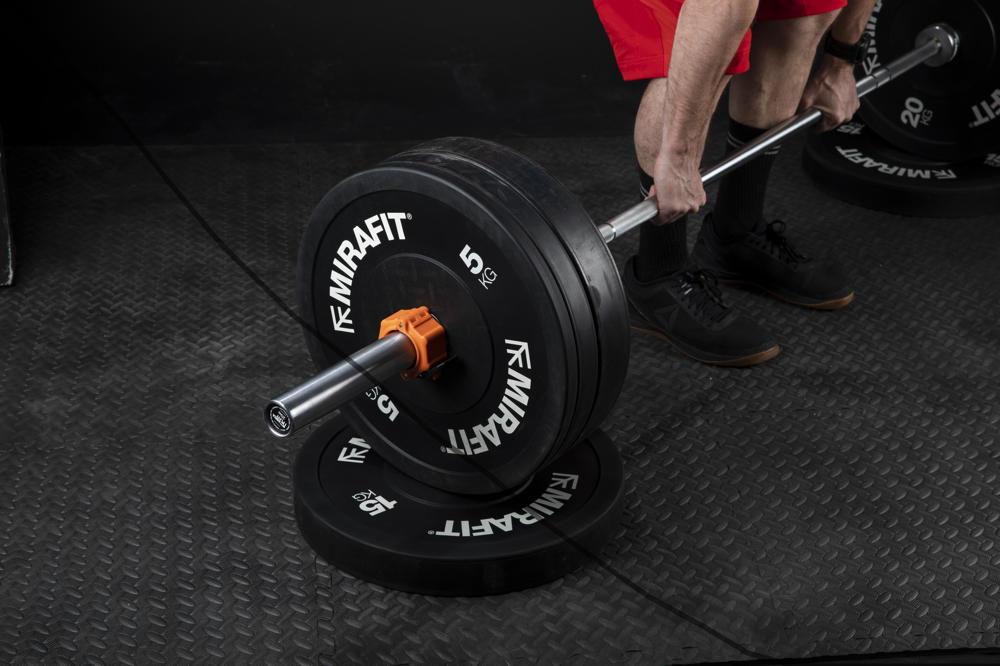
4. Lift to lockout
Before lifting the weight, pull against the bar to create tension in your whole body, particularly your core. This also takes any slack out of the bar and ensures you are prepared to lift. Initiate the pull by straightening your knees – it’s useful to think about this as pushing your feet through the floor. As you lift the bar from the floor, keep it as close to your shins as possible while maintaining your torso at the same angle as the starting position. Once the bar passes your knees, open up your hips until you are in an upright standing position with shoulders back and butt cheeks clenched. This is the lock-out position.
5. Lowering the bar
Return the bar to the ground by reversing the steps above. First, break at the hips and lean forward to lower the bar down your thighs. Once it passes your knees, bend them and lower the bar down your shins to the ground. The bar should now be back over your mid-foot, ready for the next rep.
Your coach

Jonny Thompson is head coach for Fit4Racing, an online fitness programme for mtb riders. Once a forensic scientist, Jonny has devoted the last 10 years to coaching athletes from Paralympians to world number one enduro racers. His main focus with the Fit4Racing team is developing and delivering fitness programmes to pro and amateur riders.
Training the likes of Adam Brayton, Jonny also sends digital programmes to riders all over the world, many of whom ride professionally.