E-bike climbing skills. Power on tap and extra weight demand a different approach to get the best out of your e-bike, especially on steep climbs and steps.


Coach Akrigg
Chris Akrigg is known for hunting out crazy technical lines on all kinds of two-wheeled machines, including more recently electric mountain bikes. Type his name into Google and it will throw up a whole host of videos documenting the Yorkshireman’s superhuman skills, riding stuff most of us wouldn’t even dream of. It’ll also reveal a treasure trove of Chris’s techniques and moves that we can all learn, whatever our skill level.
This time we’re delving deeper into a couple of climbing techniques Chris regularly uses out and about on the e-bike. Extra power plus the weight of a motor and battery changes the way even the best electric mountain bike handles, so you’ll need to data the methods you’ve picked up on a regular bike to squeeze the maximum potential and fun out of your e-bike. The two specific skills here will potentially unlock sections of trail that were un-climbable without an e-bike: first, learning to get up the steepest of pitches, and second, tackling sharper obstacles or steps in the trail.
The coach: Chris Akrigg
Chris is a multiple UK trials champion and GT rider who’s been bossing it on all kinds of bikes since the early days of British mountain biking. Best known for concocting a continuous stream of internet videos packed with insanely technical lines that showcase his skills, Chris has been part of the growth in popularity of e-bikes. He’s now putting them front and centre in his edits, whether it’s riding up near-vertical banks, trees and streams, Chris has set a new benchmark for what’s possible with a motor. A unique, powerful and controlled rider, he’s one of the best bike handlers out there.

Crouching Tiger
Skill 1: Crouching Tiger
E-bikes might be way heavier than regular bikes, but rider weight is still by far the largest chunk of overall mass being pulled uphill on a climb. Adding assistance obviously makes it easier to climb up much steeper and more sustained pitches than with leg power alone, but the motor also necessitates a different approach to maintaining traction and balance.
With this crouching tiger position you can harness more of the assist without wasting power, overcooking it or unsettling rider balance. Basically, if the incline gets too steep or ground conditions are lacking sufficient traction, this is a technique to get you way higher than a more upright riding stance ever will.
Crucial to this is compressing your body weight downwards to get your centre of gravity as close to the middle of the bike as possible. That way, weight is more evenly distributed between tyre contact patches to get power and bite down on the ground. That is the best way to utilise the extra drive, without the front wheel rising into a wheelie and looping the bike out or forcing you off the back.
On an e-bike, weight has to be slightly more rearward than a regular bike to prevent the rear tyre from spinning out. This is because there’s extra drive where the rubber connects to uneven trail surfaces and means it’s way easier to fire out loose stones or spin-up on greasier surfaces than when cranking uphill with your legs alone. If your rear tyre does break traction you’ll probably ground to a halt as your cranks will surge forwards violently with no ground connection.
Maximum traction on an e-bike comes from the rear tyre having sufficient weight loaded into it to allow the knobs to bite. It’s also vital to try and maintain a smooth power transfer to keep that grip continuous.
By almost exaggerating how low you get and having a flatter back and more rearward hips, it’s easier to load both tyres simultaneously and ensure power delivery is syncing with the ground, driving you and the bike forward.
The method
1. Keep your head as far forward as possible to weight the front tyre sufficiently. This leaning forward position has to be exaggerated compared to a normal bike since you’ll likely be riding up steeper inclines than ever, plus the extra power and drive at the rear tyre makes it easier to wheelie, loop out and fall off the back.
2. Set motor to Trail or equivalent as less torque allows a smoother power delivery and reduces the chance of a violent wheelspin. Lower tyre pressures also amplify grip if you fancy tackling the steeper climbs for a special skills session.
3. Subtle shifts in your hips and torso height are all it takes to allow weight to move between wheels.
4. Approach with saddle low to enable waist and chest to be really low down in a crouch. Your approach angle, line choice, gearing and power mode settings all come into play. Especially if it’s super steep, wet or loose, it needs a lot of finesse and adaptability on-the- fly to get up the most technical sections.
5. Anticipate potential wheelspin spots and work carefully with the overdrive – if you stop driving the cranks on top of a slippery or loose surface it may be too late, as the motor will continue giving assistance for the second or so that might cause traction to fail. Try to work out through trial and error where the edge of the power is, which gears work best and how to manage the assistance smoothly.
6. Smooth and consistent power delivery is crucial to winch up the steepest gradients – make sure you’re conscious of not stomping on the pedals at points where traction will be compromised like a greasy patch of earth or a slimy root.
Common mistakes
Putting too much power into the ground leads to wheelspin. Controlling this is a combination of choosing the right power mode and also learning to be very delicate and smooth when you’re cranking. Putting the bike into Turbo or Boost mode is an easy pitfall to make as it’s tempting to think you want all the power you can muster to surge up a tricky section. In reality, deliberately staying slightly on the underside of the power is a better option – use your legs more and you’ll better sense what’s going on with your traction and can therefore fine control the power more accurately.
Too much kick from the motor can put excess torque through the cranks and any slip at the rear tyre will blast you forwards with the motor, effectively stopping your heavy bike dead. An e-bike spinning out at high revs effectively cuts the power completely, as the torque sensor reacts, so you’re stuck on a machine that weighs double that of a normal bike. Worse, it’s impossible to get going again without dabbing and physically moving the rear tyre to a place with more traction, which might not be an option in tricky terrain.

The Power Wheelie
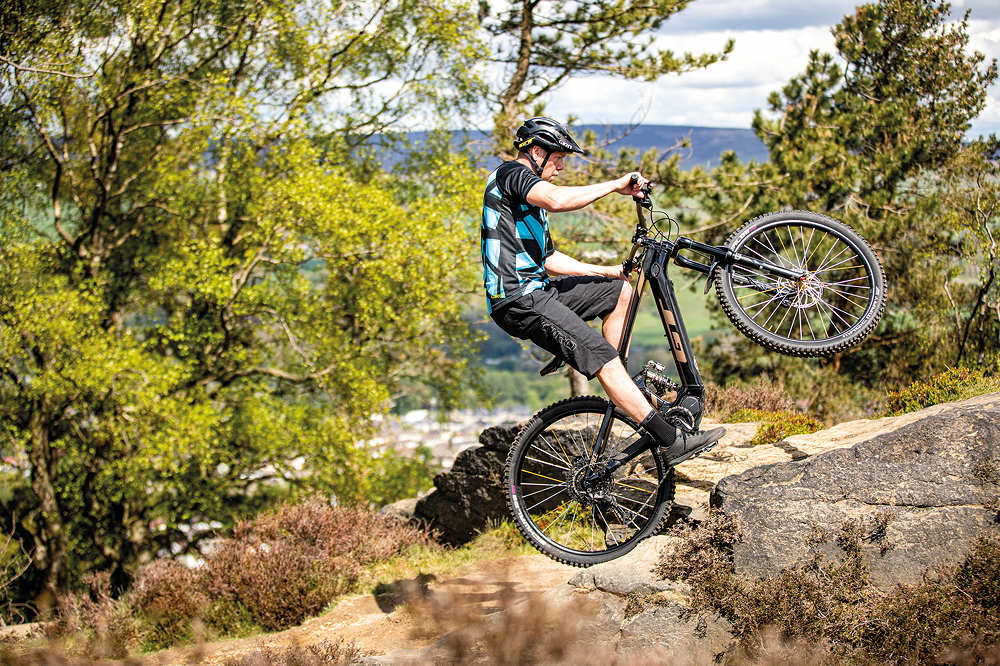
Skill 2: The Power Wheelie
One area where it’s possible to approach obstacles differently with an e-bike is climbing up big steps or ledges. This is a more advanced move and you need to be pretty confident in your wheelies to start with. This technique is brutal, but effective – to power straight up steps or vertical rock and roots continuously on the back wheel.
On a normal bike you don’t have enough pure horsepower for this move. It’s always more of a rocking-horse weight shift effort to get your front wheel up, followed by a forward motion and a sudden weight shift. It’s similar to a bunnyhop to kick the back end up to meet it.
With a motor it’s easier to drive straight up things on the back wheel. There are some great advantages here – greater crank clearance, less chance of a loss in traction and fewer surges at the motor to affect balance. It doesn’t work for everything if it’s undercut or totally square, but a lot of times you can get away with it.
As soon as you stop pedaling, you lose assist. Learning to keep the motor working to your advantage is an extension of what you’ve already trained yourself over years on a normal bike – essentially, ease off the power on slippery roots and loose surfaces to increase traction and keep that power consistent rather than spinning out.
On the e-bike, steps can be more like one continuous fluid motion. It’s a case of slapping into the bottom of a step and then pedaling through it to maintain momentum. So long as the front tyre clears the obstacle, there’s enough power to drag you up quite big faces or edges. Once you get used to your weight balance and more comfortable on the back wheel, it’s really effective.
The method
1. Approach with the exact line choice you’re going to take. Sometimes it’s not possible to have a balanced position in the run-up to an obstacle, so you need to be ready to react close to any obstacle.
2. Shoulders need to be relaxed and arms allowed some room to adjust. But using a pushing motion through the motor’s power in the legs will always be more effective and safer than pulling at the bars with hands to control the tipping point.
3. Start with your body weight low and chest tight to the bars and top tube and time the acceleration to match extending your arms further – your legs and the motor achieve the lift, not your arms.
4. If you’re seated climbing beforehand, make sure the saddle is low, so there’s enough room to hover the groin and torso above the seat and keep pedaling – the continuous cranking will ensure consistent power delivery and traction. Power through any small bumps or irregularities in the ground.
5. As a minimum, make sure feet are in a good position if you’re on flat pedals, and nothing on the bike (like a raised saddle) is going to hamper you changing position rapidly. Select an appropriate gear – usually near the top of the cassette for steeper steps. Choose a drive mode that allows some extra input from your own power.
6. Your hips will be behind the saddle and the main key to balance when stood up is maintaining good flexibility in your legs to shift body weight up and down.
7. Once the front wheel is lifted, forcefully accelerate into the obstacle and ‘slap’ the tyre, always maintaining drive in order to lift the rear tyre up the bump face. Having the front wheel lifted affords valuable clearance room for the bottom bracket and cranks to keep spinning.

8. Maintain power delivery right through the obstacle until the back tyre is fully up to the next level. At this point, easing off on the power will allow the front tyre to come back down and you can prepare to anticipate the next trail feature.
Top tip
Keep the back brake covered at all times and be ready to pull the lever the instant the bike feels like it might loop out – this will bring the front tyre back down immediately. If the back brake is mis-timed or you simply end up unbalanced, having the seat low also enables a jump or step off the back.
Common mistakes
Lacking commitment – it’s easier to commit if you have the basics sorted. Make sure to anticipate your weight shift back and be ready adapt on the fly. Your approach angle, spotting the smoothest line, gearing and power mode settings all come into play. It needs a lot of finesse to get up the most technical sections, especially if it’s super steep, wet or loose.
Make sure you’re ready with your pedals in an appropriate position, and once you start to slap into the step or face keep the power delivery going through the move – any let-up in the pedal revolution and you’ll lose drive. Get comfortable with jumping right off the back of the bike if your balance tips too far back.