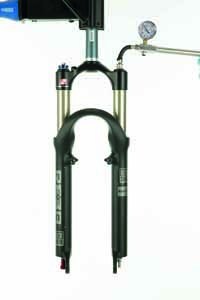
 Most Rock Shox suspension forks use a lubrication system called an ‘oil bath’. This means there’s a small amount of oil in the bottom of each fork leg and its sole job is to keep the seals, bushings and other internal parts lubricated and free of corrosion. It plays no part in damping the fork. There’s only about 15ml, about two tablespoons, of this oil in each leg so over time it can become contaminated and break down. For this reason Rock Shox recommends you replenish it after every 50hours of riding, or sooner if you ride in really wet or really dry conditions. It takes about 30minutes to complete this step-by-step and only requires very basic workshop tools so is something you can easily do at home. Attempting this service should also give you a better understanding of how your fork works and will allow you to spot any potential problems, like a damaged seal. If you’re in any doubt check your owners manual.
There are a couple of things necessary for this service — some Red Rum, which you can buy/order in various sized containers from a Rock Shox dealer; a deep 10mm socket — one that is bored all the way through or extra long; and to clean the inside the legs some IPA (Isopropylalcohol). This is available from some chemists and is ideal for cleaning the inside of the legs because it evaporates leaving almost no residue, important because you don’t want to contaminate the oil bath.
Helping us this month is SRAM technical manager Gary Mullaney from Rock Shox’s UK importer Fishers Outdoor. If you feel you’re not up to the job and rather send your fork to a professional, Fisher Outdoor will service them. It charges £55-60 for a standard seal service and you can contact them through www.rockshoxforks.co.uk or call 01727 798347. There’s a list of other services it offers, plus details on custom tuning and upgrades on the website.
TOOLS FOR THE JOB:

10mm socket / Allen keys / Rock Shox Red Rum 4oz £6.99 / 16ox £14.99 / IPA / Judy Butter

1 If you’re servicing an air fork check the air pressure with a good shock pump — record the pressure in the positive and negative chambers. Also make a note of the position of the rebound dial.

2 Depressurize the fork — you can use the rebound adjuster from the bottom of the right leg. Release the negative first then the postive.

3 Loosen the airside foot nut with a 10mm socket about three to four threads.

4 Using a soft-faced mallet hit the end off the exposed shaft. The threads should disappear inside the fork. Repeat for the other side using a 5mm Allen key.

5 Have a drip tray ready to catch any excess oil. Then remove the lower legs. You may need to give them a gentle tug. If they don’t budge unscrew the foot nut/Allen bolt a few more turns and repeat step 4.

6 Clean out the lowers with the IPA and a clean rag.

7 Pay particular attention to the seals. Once they’re clean smear a small amount of Judy Butter onto the inside.

8 Now reinstall the lowers. As you do this make sure the wiper seals don’t fold over. Slide the lowers on until there’s about seven inches of exposed stanchion.

9 Rotate the fork until the legs are horizontal.

10 Using a syringe squirt 15ml (15CCs) of Red Rum into the bottom of both legs.

11 Slide home both legs and re-install the foot nut and 5mm Allen bolt. Torque these to 60in/lbs or 6-5NM.

12 Finally, give the fork a good clean and apply a small amount of Red Rum or chain lube onto the top of the seals, cycle the fork a couple of times and you’re good to go.
TOP TIPS:
A rag tied to the end of a stick should make step six a lot easier or you can buy something like a specific Barrel Cleaning Kit from various Paint Ball websites for about a fiver.
After every ride follow the procedure described in tip 12. As you cycle the fork it should draw out any dirt from under the seal and deposit on the stanchion. Wipe this clean with a rag. Repeat until the oil is dirt free.
The reason you release the negative chamber first is to stop the fork sucking together. If you release the positive first, chances are you’ll have to pull the fork to full extension to release the negative air, which can be tricky.