 Instead of the usual single-process step-by-step of the mbr Workshop feature, this month we show you how to tweak your riding position. We will be using the built-in range of available adjustment to every rider using only the humble Allen key.
These adjustments, despite being seemingly triflingly minute, can have a huge effect on the handling and comfort of the bike. Moving your weight an inch rearward by shifting the saddle, or raising the bars by a similar amount, can totally change the way your bike rides.
After the big shifts, there are also the simple control position changes that make controlling the bike more ergonomically correct. Simply put, ensure levers and shifters are in the correct place, and won’t put undue pressure on your joints.
You can follow the process from stage one right through to the end, or you can dip into individual sections: it will all help improve your time on the trails. It’s well worth experimenting to see how the adjustments feel. There is not a ‘right’ or ‘wrong’, with some things, just personal preference, so get fettling. And it’s all free!
TOOLS FOR THE JOB:
Just a simple Allen key block this month. You’ll need 3, 4, 5, and 6mm Allen keys
BRAKE LEVER POSITION:
Moving the brake levers can prevent the control area feeling too cramped, making for more relaxed, less tired hands.

1 As standard levers are generally against the grip. Loosen lever — and shifter —clamp bolts.

2 Push the shifter and brake levers inward until, when your index and pointing fingers are outstretched, they sit on the end of the lever blade — as shown.

3 If the levers are too far from the bar, the small reach adjustment bolt will bring them closer; perfect for small hands. When in position, clamp the shifters and brake levers.
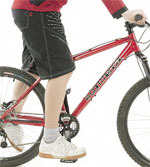
SEAT HEIGHT:
Getting your seat at the right height is the bare minimum when it comes to set-up.
1 Loosen the seat bolt or quick-release and extend the post to a guesstimated height. To test the height, place your heel on the pedal. Your leg should be totally straight, but not stretched.

2 Check that when the ball of your foot is on the pedal, your knee is bent. This is the highest you ever go. Technical trails may be easier with the seat a little lower. But too low, and pedalling gets uncomfortable and can damage the knees.

STEM POSITION:
Raising or lowering the stem, like moving the seat, can change rider weight bias front to back, altering the way the bike handles. It can also reduce, or increase, how stretched the rider feels. Higher is generally better for downhills, lower for climbs. But, as with all adjustments, don’t be afraid to play around and explore the options.

1 Remove the central Allen key bolt and top cap.

2 Undo the stem clamp (side) bolts and remove the stem by sliding it up the steerer tube. Remove the spacer rings, taking care not to lose any.

3 Replace the stem at the desired height, put spare spacer above the stem. You MUST use them all: they should extend above the top of the steerer tube.

4 Replace the top cap, and without tightening the stem clamp bolts, tighten the central Allen key until any slack is taken up. Then, while holding the front brake on, rock the bike backwards and forwards with a hand around the top headset race. In stages tighten the central bolt. The headset is perfect when there is no rocking, and the headset does not bind when you turn the bars. Then do up the side bolts.

To get the bar even lower some stems are reversible so they ‘drop’ rather than ‘rise’.
1 Remove the face plate of the stem, by undoing all bolts, leave the bars to hang down. After removing the stem (at stage 2 above), and before replacement, flip the stem. Continue the fitting process as detailed.
2 This is as low as the bars can go. A flipped ‘dropping’ stem with all spacers above it.
BRAKE LEVER ANGLE:
This adjustment places the levers in a position that will not put undue pressure on your wrists.

1 Loosen the brake & gear shifter clamp bolts then, while sat on your bike, extend your fingers in line with your arms. Rotate the brake levers so they sit in line with your extended fingers.

2 Clamp up, not forgetting the shifters. Never clamp too tight — you want the shifters and levers to move if you crash, not snap.
SEAT POSITION:
Moving the seat on its rails can reduce or extend the reach of the bike, and shift the weight bias from front to rear.

1 Undo the Allen bolt (or bolts) on the seatpost, under the saddle.

2 Slide the seat backwards or forwards on the rails, tighten up, making sure the saddle is flat front to rear.