When the trails get wet, loose and rooty and grip is in short supply, it's important to clean up your technique, find traction where you can, and a smooth everything out.
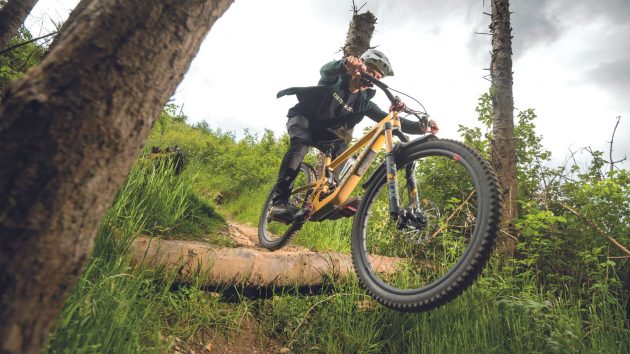
Autumn is here. The trails are wetter, roots and rocks seem to be everywhere, and the ground that once provided grip and stability is now sloppy and loose. With all this movement on the trail, it’s time to focus on riding with clean technique.
We detail how to smooth out complicated bits of trail, how to balance the effects of gravity with how much grip is available, and how to make the control you have on complicated trails feel more consistent and predictable.
It’s also worth considering what forks you’re running, checking you’ve got the best mountain bike tyres, and that your brakes are in tip top condition.
Suspension set-up

Adding volume spacers to your suspension allows you to keep your travel supple off the top, whilst ramping up later on and reducing a harsh bottom out
Setting your bike’s suspension up is always a compromise. If it’s harder it will move less and pedal really well, but the downside will be that it feels harsh on choppy terrain. If it’s soft it will feel plush over small bumps but bottom out hard when you brake on steeper trails. There are a few tricks to setting your bike up to feel balanced though.
More progressive travel

Depending on how aggressively you ride, and how much you deliberately drive your body weight into the trail, you might want to look at adding tokens or volume spacers to your shocks. These reduce the amount of air that can be contained within the chamber and mean that your fork and rear shock can ramp up faster towards the end of their travel.
In practice this normally means that they can remain soft initially but ramp up towards the end so that you don’t get those harsh bottom outs. It will change where the ‘platform’ is though – in other words that place where your suspension stops moving into its travel and you feel support.
Fork set-up for steep trails

Steep trails are tricky to set up for because heavy braking puts more weight on the front of your bike. This additional load might even continue to dive when you hit something and feel like it’s sending you over the bars. If you have low speed compression adjustment you can compensate for this by adding a few clicks. Your fork will still move freely when you take a bigger hit, but will sit higher in its travel and feel like it has more support on the brakes.
Ideally finding the balance between keeping your fork supple enough, and providing support, will be the ticket to feeling stable under prolonged braking. Make sure you have the spring right, experiment by going up and down in no more than 5psi increments to really dial it in. Suspension set up is a minefield, but most local bike shops will be able to offer good advice as they will know the local trails and understand the set up options of the products they stock.
Aim for consistent body position

It might seem counterintuitive, but keeping your weight low will open up so much more control on steep and slippery trails
One of the worst things you can do when descending on steeper gradients is to keep your weight back. Hanging off the back of your bike will put all your weight in the wrong place, limit how much you can move when you need to, and basically turn you into a passenger. When the trail ahead of you looks steep you need to get low. Keeping your regular footprint on the trail, but maximising your range of motion by getting closer, will mean you can keep your body weight separate from any movement that occurs underneath you.
Body position for slow drop offs

Getting closer to your bike on multiple drops will make the trail feel easier because you can let the bike do what it wants without it throwing you about
A lot of steeper trails have multiple steps or drops that can really mess with a rider’s stability. You might be able to handle one or two, but as soon as there is more than that you might find yourself locked into a seesaw action that just gets worse and worse.
The trick here is to make your ‘reset’ position between the rollers deliberately close to the bike. Try to keep returning to this stable shape between each drop, and you’ll maximise the range of motion you have, completely isolating you from what your bike is doing underneath you. This means you can handle multiple drops and plunges while keeping your body weight neutral and your perceived exertion low.
Body position for fast drop offs

Manualling off fast drops will keep your front end high and mean that both of your wheels can come down smoothly at the same time
If a drop is above a certain size, or you are hitting a single drop at speed and there is somewhere to land afterwards, then rolling it isn’t an option and you need to land both wheels together by keeping the front end high.
This is essentially just the same as a manual where you come in low and be able to use your full range of motion, but instead of letting the bike drop away from you like a rolling drop, you throw your weight backwards and your bike forwards. This sudden throw of momentum will maximise with your arms straight out in front of you and will pull the front wheel up for a second. Time it right and you can land smooth and evenly.
If seen in a photograph this often looks like a rider is keeping their weight back, but it’s the sudden throw of your body that counters the front end up.
Aim for fluidity

The temptation on steep loose trails is to defend yourself by getting back. Don’t do it! Staying close to the front will allow you so much more movement when you need it
One of the best control mechanisms on a choppy trail is using fluidity to remain stable and confident.
When you pull your brakes on rough terrain, two negative things happen. The first is that you lose grip at the wheel. Braking will be easy to gauge on consistent surfaces, but over roots, loose ground, or wet cambers it will be impossible to judge, meaning your wheels will slide all over the place. The second, and arguably the more difficult one to catch yourself doing is that you will stiffen up to counteract the braking forces.
Bracing against your bars and pedals will mean that you effectively go rigid and every bump will feel harsh and sharp. If you are braking through a choppy and unpredictable area of the trail it will feel more difficult, and you’re unlikely to want to go any faster.
Stop braking on the rough stuff and the trail will feel easier, more fluid, and you will have more time to gauge your grip.
Braking technique – find the grip zones

Braking in the safe places will open up so much more grip when you need it further down the trail
If you are off the brakes for all the rough stuff, then you’re going to have to identify the tidy and smooth places to brake on the way in. Recognising these safe braking zones, and scrubbing your speed off when it’s easy to do so will mean you can be off the brakes where it counts. The steeper the trail the more you’ll need to brake on the way in.
Try and pick places where you can see big patches of smooth dirt, or something that has a texture that you can predict. There might be a little movement if the trail conditions are harsh enough, but this movement should feel consistent and predictable.
Dropping heels on the brakes

Dropping your heels will mean that you can take a lot of weight through your legs when braking
Paying attention to the shape you hold yourself in while braking will mean that you can brake more effectively and with more control. Staying low and holding a stable shape will start to take its toll, and you may find that as you get tired you’ll start to straighten your arms and start to creep back to a more upright position.
Really focus on dropping your heels whilst braking and you’ll be able to support a lot of your body weight through your legs meaning that you can remain low without putting too much stress through your upper body.
Neutral body – open knees

Opening up your legs will allow you to let the bike move about when it needs to without it affecting your neutral body weight
As the features start to dance you about and you need to let the bike get loose in order not to fight the trail, one of the best things you can be aware of is keeping your upper body as still and neutral as possible and letting your knees do all the balancing.
Deliberately getting close to the bike and opening up your legs will mean that you can counterbalance without disconnecting your body. You will feel more connected with the trail and the front end of your bike, while the back end can skip and skid without throwing you off line. Being aware of this technique and deliberately putting it into practise will make a huge difference to how difficult the steep section of trail feels to you, but try to be equally aware of when you don’t do it.
Being honest with yourself about why a particular section felt so difficult or off balance is the key to doing it better – come into it with a deliberate plan the next time. This is of particular importance when it gets wet, slippery and loose as it will be a lot easier to drift off the back and pull your brakes more.
Line up with the exit

Lining your body and hips up with the next grip point will mean you can drive your weight into the trail and change direction positively and reliably
Seeing a supported bit of trail that you can drive against should give you the security to let the bike get a bit sideways on the brakes on the way in. This is because you can be safe in the knowledge that once you arrive at that next grip point, you can push your body weight through your legs and pedals and drive that traction that you need into the trail.
To really maximise this grip point, focus on staying low, and getting your body and hips facing the direction that you want to go on the way out. Having a neutral body weight on the way in will mean you have more time and accuracy to line up your exit. You should be able to make solid and deliberate connections with the trail and drive yourself out in the direction you want to go.
Time for some purposeful practice

The next time you see a steep section of trail ahead of you, get low and open up your knees
Practice equals improvement, so over the next few weeks, start to notice where you’re braking, and what shape you make when your bike starts to move about on the slippery stuff.
Really focus on getting low, braking where it’s safe, and letting the bike move when it needs to. You might find that there’s more control than you previously thought.