Going fast isn’t as risky as you think

Keeping it low-key by selecting the right line and timing your attack will boost your control and leave the showboaters for dead.
>>> MBR Trail Bike of the Year 2020
We all love that feeling of nailing a section of trail, getting away with it, or scaring ourselves a little while seeming like we’ve got it all under control. Some riders ride with so much confidence it hardly seems like they’re trying. This month we’re going to look at the wider concept of how to actually go fast on a bike. We’ll break down what it should feel like, what you should be thinking about, and ultimately what your goals should be. With a little time spent pursuing the correct outcomes, you’ll be surprised by how easy it is to go quicker.

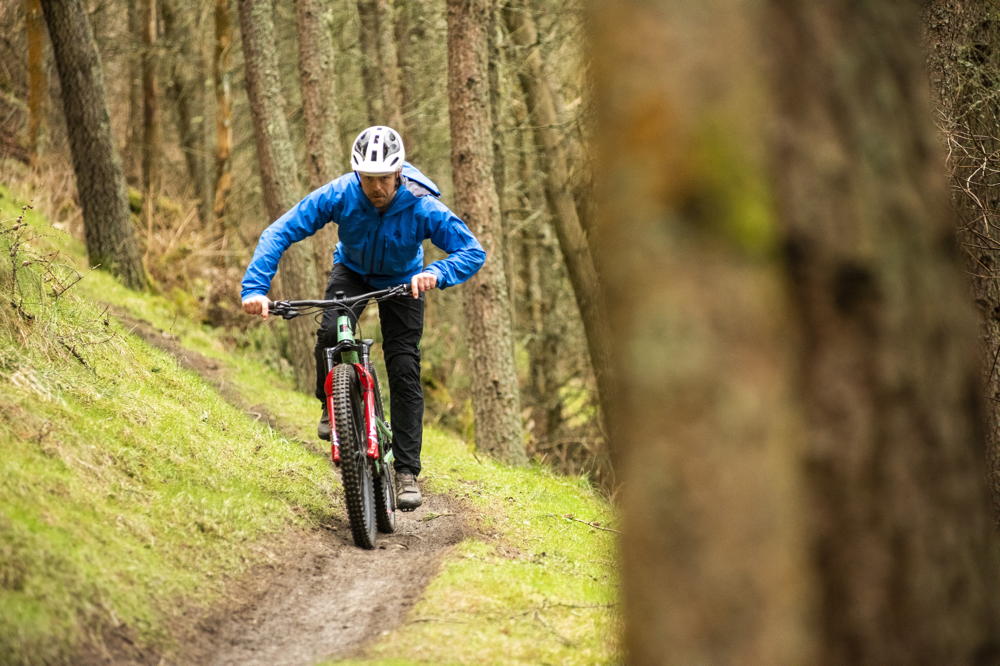
Having a confident body position will allow you to scale your riding without causing any stress
1. Looking ahead
The faster you go, the more there is to think about, right? Not necessarily. We’d say that the faster you go, the less you want to have to think about. Break the track or trail down into areas that you want to consider. Grip points, braking zones, cambers that are in your favour, open stretches, breathers… all of them positive. The less negative stuff you have going through your mind, the better. That’s the whole concept behind grip points. You only see, and subsequently think about, the good stuff.
2. Neutral riding position
As always we’re going to start off with the usual body position, only this time we want you to think of this as the most confident stance you can make on a bike. You know the score: legs straight, elbows out, heels down, head up. You want to make this position as automatic as possible so that every time you feel out of control, threatened, or have moments between all the chaos, you can snap into this shape with confidence. It’s your reset position that you go to in times of trouble and will allow you full range of motion whatever is happening around you.

Looking at where you want to go sounds easy but will take deliberate practise to perfect
3. Line-in corners
Every time you come to a turn on a trail you want to be trying to ride a line that opens the corner up as much as possible. It might be tempting to ride the inside line because it covers less ground, but this will only really work if the exit of the turn is steep enough that you’re up to speed immediately. In most cases opening up your line on the way in will allow you to fall back into the turn with enough room to spare on your outside on the exit. This means that you will carry more momentum through the mid part of the corner and still have enough time to gauge your grip. It’s worth being patient on the way into turns. Rushing through will only lead to you tightening up and braking, or at the very least feeling like you’re running out of room and losing confidence. Chill out and you’ll carry more speed out.

Everything you do will revolve around the shape that you automatically make. Work on your position and everything else will follow
4. Exit speed
When it comes to going fast, no matter what you’re riding, it’s all about the exit. Whether you’re looking at a technical chute, a drop-off with an awkward entrance, or a straight forward right-hander, your first question should always be, “how do I carry speed out of this?” If you can keep that in mind, then everything works its way back from that. It might look flash to skid up the inside of a turn, or send a gap over some tree stump, but if it isn’t saving you time then it’s worthless. Instead, try and ride into a feature patiently so that you can use gravity to accelerate you through and out the other side.

Some of the shapes you see riders make in the air are more to do with controlling their trajectory at speed and less about trying to look cool
5. Speed jumping
In these articles we are normally telling you to drive slowly with your legs into the increasing steepness of a take-off to get the maximum air time. If you’re already hauling though, or you’re looking to carry more speed with you down the trail, then you might not want to send it at all. You might instead want to keep it low. After all, an upward trajectory that then has to come down again means that there is less momentum moving forwards. If you are wanting to jump fast, and carry more speed out the other side, then you’re going to have to be a lot more dynamic and absorb the last part of the jump to stay low. This has its own risks, but with a little practice, can mean you barely leave the ground.
6. What to do to stay low
Come in fast and as you drive into the heaviness of the jump, peak your effort a little earlier than normal. When you come off the power, the last part of the jump will want to drive back into you, meaning that it will clip your back wheel and rotate you forwards. You’re going to have to counter this by picking your back end up completely – not unlike bunny hopping from the middle of the jump to avoid the lip. Sucking up the final part of the jump will mean you’ve not committed to the full boost of the take-off. To keep it level, be ready to stand up and pump your bike down in the air. This will level out your trajectory and keep you moving forwards. You can suck your bike up again as you come into land and remain fully in control. Look for this exact timing and powerful dynamic movement in BMX racing. They really know how to stay low and carry speed over jumps.

Having a huge range of motion means that you can handle large shapes quickly and powerfully. This shape will have started off as a strong, confident neutral riding position, and will return back there again immediately after absorbing this feature
7. Pumping backsides
Train yourself to recognise that any undulation is an opportunity for speed. Every time you see a dip or a rise, a corner or a slight upturn, you have to push back into it with your legs. This will create a pump of energy, allowing you to maintain or even gain speed without even turning the pedals. Don’t push for the downslope of a feature or the backside of a jump. Instead, time your effort for the change of direction at the bottom. The easiest way to recognise this is that if there’s a puddle at the bottom then you should push for that. It’s most likely the lowest part of the trail and where the direction of travel changes. Keep your pedals level and pump for power!
Saving your legs by smoothly carrying speed means that you can pedal harder where it counts. Being fitter will mean that you can recover quickly and be ready for the next technical section
8. Fitness
Sometime going faster is about trying harder. If you’re fitter then you’ll not only be able to put out more power where it counts, but you’ll be able to stay fresher going into the next technical area. Try and save your efforts for where they’ll make the biggest difference by only pedalling when you’re out in the open. Putting pedal strokes in everywhere will only raise your heart rate and lower your true output. Instead, focus on doing maximum damage where you can.
9. Perceived exertion
One of the biggest factors to keep in mind when trying to go fast is the idea of how fast something feels versus how fast it actually is. Leaving your braking late, skidding round corners, or powering as hard as you can out the other side might feel fast, but smoothly carrying good momentum through a technical or flowy section and laying maximum power down where it counts will win every time. Going fast is more about backing off in most places and playing a strong hand when it suits you to do so.

Taking a second or two to reset your position between different pacing zones will keep you chasing the right goals in each. Here Andy goes from a fast open section to a more technical steeper zone. First check? Get low
10. Pacing zones
The easiest way of working out where to go hard and where to back off is to break your trail down into pacing zones. We find that red, amber and green are the clearest. A red zone is somewhere you back off. Somewhere steep and technical where making as few a number of mistakes will give you an advantage. Stay steady and try and ride clean. An amber zone is a part of the trail that starts to open up but is still twisty enough that you can carry speed by being dynamic, riding clean and pumping to carry speed. A green zone is full-gas pedalling. You cannot go hard enough here. Just remember that you’ll only be able to do this if you deliberately back off elsewhere.
11. Bike set-up
If you’re riding more aggressively, hitting things faster, and pushing for speed with more deliberate effort, then you will most likely have to stiffen up your ride to cope with all that extra force. Getting the balance right will take a little experimentation, but generally you’ll want to run a bit more pressure front and rear. Aim for 30% sag on the rear, and 20% sag up front. If you have separate high-speed compression damping then you might want to add a bit more while leaving everything else where it normally is. This means that as you slam into things, your damping will be able to stop a violent bottom-out from going right through you. Slightly more pressure in your tyres will also mean that you don’t increase the risk of getting punctures. A new tyre with the correct pressure in it is always better than an old tyre being run low for more grip.

Speed comes from confidence, but confidence comes from control. Keep snapping back to your powerful neutral riding position and your pace will increase with no extra risk
12. The simple truth
The simple secret is that speed comes from confidence, and confidence comes from control. Most people gauge how fast they are going by how close to the edge of control they can get. The honest truth is that going fast isn’t about letting it all hang out, or risking more. It’s about making good progress because you’re fully in control. Your goal should be to feel confident in what you’re doing because you have tons of control. If you’re confident then you can push harder. Stay focused and put the effort in where it matters. The more confident you are, the faster you’ll go.