 When they aren’t left rusting in the confines of the garage or the shed, your pedal cleats have a hard life. They’re stamped upon, constantly clipped in and out of, ground upon rocks and treated with complete neglect. If you’ve found that your pedals don’t have the same crisp feel of retention they once had, or that involuntary unclipping is becoming a regularity, replacing your cleats might be the answer. Since most brands of cleats are widely available for about £10-£15 a set, it’s also a modest investment to restore performance.
The problem most of us will face is removing the old ones. Due to the hostile environment your cleats have to deal with, now will be the time when you discover how well they were installed in the first place. Properly installed cleats should pose no problem to remove, but if they were fitted some time ago, with little care, you may need to get nasty and attack your shoes with some power tools. Here we’ll show you how to successfully remove cleats and make it easier next time round.

TOOLS FOR THE JOB:
Replacement cleats / Vice or Workmate / Allen keys / Torx keys / Hammer / Drill / Penetrating oil / Blue Loctite 242 / Grease / Gaffer tape

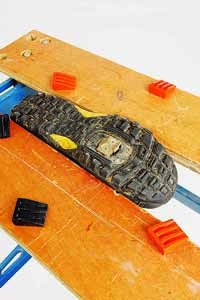
1 Clamp the offending shoe in a vice or a Workmate.

2 The first line of attack is the trusty Allen key.

3 If you can’t budge the bolt with an Allen key don’t risk rounding out the head. Soak the bolts in penetrating oil (Plus Gas) for a few minutes and try again.

4 If the bolt head does round out, you may be able to hammer a slightly oversized Torx key into the bolt and use this to undo it.

5 Last resort is a drill. Once the head of the bolt is removed the cleat should come free.

6 This is what your shoe should look like minus cleat.

7 Most shoes come with two mounting positions, so if you’ve damaged one set try the other.

8 If the threads are unusable, you should be able to remove the Cleat Nut from inside the shoe. Shimano cleats are available with new Cleat Nuts.

9 When installing the new cleat, use the marks left by the old cleat as a guide in order to achieve your usual positioning.

10 Install the new bolts with Blue Loctite 242.

11 If Blue Loctite isn’t available, waterproof grease is a reasonable second choice.

12 Finally, stick an SPD Seal (code Y-40E 98010) or a piece of gaffer tape inside the shoe, on top of the Cleat Nut, to prevent wind and water ingress.
TOP TIPS:
It helps to remove any debris from inside the bolt head so the Allen key can be inserted fully.
Make sure you use a high quality drill bit, as cleat bolts can be made of stern stuff.