Getting the right sag is a vital step on the way to optimum suspension performance, but only if you're doing it right. These points are important to consider when starting on your suspension journey.
Everyone knows how to set your sag, right? You’ve probably done it 100 times, and there’s a million videos out there showing how to do it. And most of that advice will get you into a reasonable ballpark starting point. But if you want to get as close as possible to your optimum setting, there are a number of factors you may not have considered. Taking them into account will make a big difference to how your bike will feel on the trail. So, here are six points to consider when setting up your rear suspension sag to enjoy better performance.
Why only rear suspension? Well there are a few reasons, but mostly because it’s difficult to get a consistent reading up front, and forks come with air charts that give a decent starting point. Want to take this to the next level? Why not find out more about tweaking your geometry to alter weight balance?

Sag gradients on your shock are useful, but not quite the shortcut you may have thought
There’s no magic number
What I want to make clear from the outset, is that setting your sag is always just a starting point. In fact, if you’re only going to take away one thing from this video, it should be ‘don’t fixate on a specific percentage’. There’s no such thing as a magic number. It depends on the bike, the terrain, and your priorities as a rider. Sag is just the starting point of the journey, but knowing the intricacies and pitfalls will definitely help you navigate in the right direction.

Setting your sag by sitting in the saddle will give a better all-round starting point that works both uphill and downhill
Sit down or stand up?
Most guides advise you to set your sag standing up in the attack position. So straight and elbows bent, and head over the stem, either leaning against a wall, or with a helper holding the bike. But there are a couple of problems with this. One is that it’s really difficult to hold a consistent, repeatable position with this method. Shift your weight slightly in either direction and you’re going to have a different result. It’s also quite hard to reach the O-ring on some designs from that position.
And when you climb, there’s going to be a big shift in your weight balance to the rear, and it’s likely that you’re going to end up with too much sag, poor geometry, and mushy pedal performance as a result. Remember you’ve got to balance the performance of the bike both up and down, unless it’s a pure downhill bike or you’re happy to make compromises with the climbing set-up.
One way to achieve a more balanced set-up is to measure your sag sitting down. This has the added advantage of not needing a helper to hold the bike.
- Just drop the saddle all the way.
- Sit on the bike on level ground with your feet alongside the bottom bracket and your thighs pushed against the sides of the saddle.
- Place your hands lightly on the grips, bounce up and down, then settle with your weight centred over the BB.
- Reach down and push the O-ring up to the seal and step off gently.
If we compare the difference between the same air pressure in the two different body positions, there’s an 18% gap. That’s a huge difference.
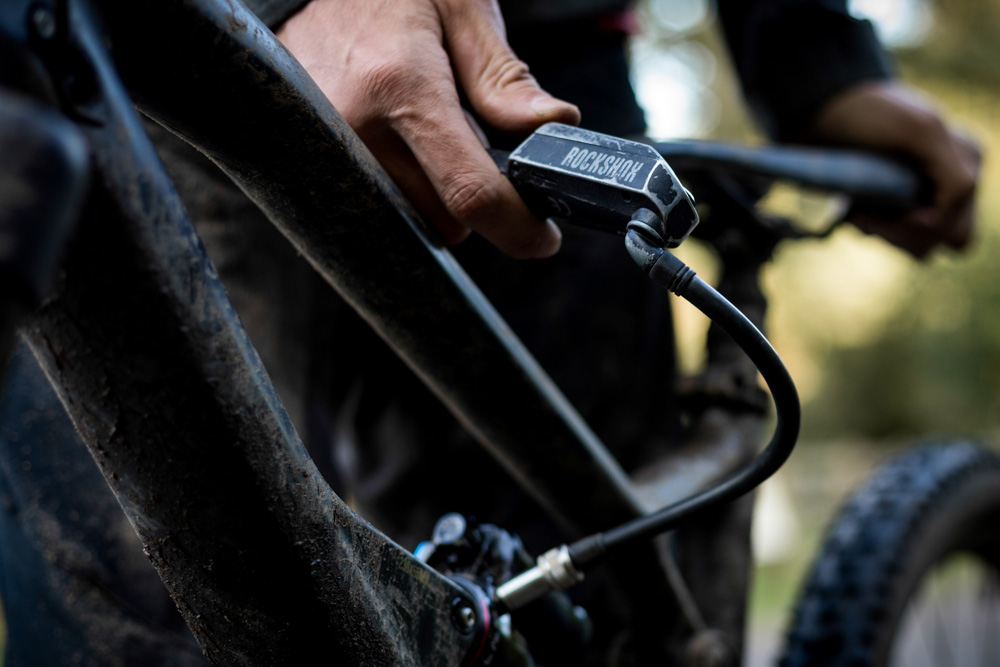
Sag at the shock Vs sag at the rear axle
Point two is a bit more complicated, but definitely worth taking into consideration. On every suspension bike, the rear axle moves more than the shock. The difference between the two is the leverage rate, and it changes throughout the suspension travel. The important point being that what happens at the shock may not correlate directly with what happens at the rear wheel, despite what the markings on your shock body might say.

The 2024 Canyon Spectral CF 9 was our test mule for looking into sag.
Let’s look at an example. The 2024 Canyon Spectral in the video has helpful sag gradients on the shock to simplify the process. And Canyon’s makes it doubly easy by giving you a very precise recommended sag – which is 27.5%. We know the shock stroke is 55mm thanks to the Canyon website, so 27.5% of 55 is 15.1mm.
Job done.
Well not quite. Let’s work it out another way.

The Canyon Spectral’s leverage curve can be used to work out sag at the rear axle, rather than the shock.
Canyon says the Spectral has 140mm of travel, so 27.5% of that is 38.5mm. If we look at the leverage curve for the Spectral we can see that the leverage ratio at 38.5mm travel is 2.737 to 1. Which means that the rear wheel moves 2.737mm for every 1mm of shock stroke at this point in the travel.
38.5mm divided by 2.737 gets us 14mm of shock stroke. Which means 27.5% of wheel travel at the shock is actually 14mm, not 15.1mm. That’s a 7% difference. So even if you have sag gradients on your shock, that’s not going to be a true measurement of sag at the axle.

Our Spectral has 54mm stroke, 1mm less than advertised, which gives a 3mm discrepancy at the rear axle.
Actual stroke and travel Vs claimed travel
This gets even more problematic when we consider that a bike might not actually have the travel it says it has. Like this Canyon Spectral here, which has 136mm of travel, not the 140mm claimed. So to be really accurate when measuring your sag, you need to measure the actual travel of your bike. It’s actually fairly simple, it just takes a bit of time.
You’ll need some straps, a spirit level, and a tape measure.
- Let all the air out of the shock, and compress the bike until it bottoms out with a ratchet strap.
- Strap a spirit level to the saddle and measure the perpendicular distance between the centre of the rear axle and the spirit level.
- Or you can flip the bike upside down and measure the distance from the axle to the floor.
- Now release the ratchet strap and inflate the shock until it tops out.
- Using a track pump makes this part of the job a lot quicker.
- Once again measure the distance between the axle and the level and subtract measurement A from measurement B.
That’s your actual travel. And while you’re there, measure where the O-ring ended up at bottom out, to check the shock stroke.
We’ve been doing this to our test bikes for a long time, and come across loads of bikes with discrepancies, some with as much as 10mm less than advertised.
Using the same shock pump ensures consistency
Adding or subtracting air
The next thing that can trip you up when setting up an air shock is the negative spring. When adjusting the air pressure, you have to make sure you balance the positive and negative air pressure otherwise you’ll get a false sag reading. Whenever you add or release pressure, you need to compress and release the suspension bleed air between the two chambers. You can leave the pump attached for this part. But remember to remove it before you take another sag reading.
If you measure it with the shock pump attached, you’re effectively increasing the volume of the shock, and you will end up with too much sag. We’d also recommend always using the same shock pump to make adjustments, then you know they are consistent, even if the gauge isn’t 100% accurate. And always jot down your settings so you know where you started, and if you change anything then note down what you changed and how it felt – whether the change was good or bad.

Fitting a coil shock can bring improved performance, but is more complex to set-up
Coil springs
So far we’ve been talking about the challenges of setting up sag with an air shock. But if you have a coil shock, your life just got a whole lot harder. Why? Well measuring sag is much more difficult, changing the spring rate is more time-consuming, more expensive, and less accurate, and it’s really difficult to know whether you’re getting full travel.
Let’s talk about measuring sag first. There are a few ways you can do it, but none of them are straightforward. On some shocks you can reach through the spring and push the bottom-out bumper all the way up the shaft to the shock body and use it as an O-ring. This is the easiest way to measure sag as it doesn’t require a helper, but it’s not very easy to measure the position of the bumper relative to the shock body because there’s so little space to take a measurement. Another way to do it is to measure the distance between the spring collars with the bike resting. Then get someone to measure the distance between those two points with you sitting on it.
Once you know the shock stroke, you can work out the sag percentage. Alternatively you can buy something like the Reverse Components Travel and Sag Indicator. These are about €30 and have the added advantage of being able to tell you how close you’re getting to full travel.
Once you’ve got a sag measurement, you better hope it’s in the ballpark, because if it’s not you could well be ordering a new spring, and that means more $$$. Yes, you can use the spring preload collar to fine tune the sag, but you should only add two full turns of the collar before you need to obtain a different spring.
Which is why the Springdex system makes so much sense, as you can tune your spring rate – and therefore your sag – in 10lb increments without adding harshness by winding on preload.
The five key takeaways from this article are:
- Sag is just a starting point and small variations in sag can make a big difference to how a bike performs
- Consider which body position you use to set your sag
- Remember that sag on the shock shaft won’t be the same as sag rear wheel
- Claimed travel is not always the same as actual travel
- Buying a coil shock is going to make setting up your suspension a lot harder