 If you read the Whyte E5 test in the last issue you’ll know we had a few issues with the Maverick SC32 suspension fork — it felt harsh at high speed and almost locked out hitting exposed roots and those square-edge rocks. We’ve talked to ATB Sales, Extra UK and Maverick in the USA about the fork’s performance since then, and all have suggested a bit of tuning. Since the SC32 uses a simple shim stack on the compression stroke this is actually pretty easy. It’s also something we’d recommend owners do at home because they can make a change and then ride the fork. If they don’t like it, then they can always swap it back. All this costs is time, whereas a shop or one of the suspension service centres will charge for tuning and you’re unlikely to be able to ride the fork there and then.
On the shim stack are three shims: 21, 15 and 12mm, and while there are only two recommended configurations (which are shown in step 12) you can experiment with a couple of other things. The shims sit on a piston head and this has a machined recess on one side and is perfectly flat on the other. If you place the shims on the flat side, oil will flow past them more easily.
You can also experiment with different oil viscosity. Maverick doesn’t recommend lighter oil than the stock 5wt, but it does suggest heavier 10 or 15wt for bigger riders. There’s also a range of spring tuning options, including different strength negatives springs, or adding more oil to the spring chamber or cartridge to make the spring feel more (or less) progressive. Most of the tuning options are on a tuning chart, which you
can download from the Maverick website (www.maverickamerican.com/maverick.manuals.htm). There are also detailed service instructions for the lock-down and rebound assembly, and if your fork is a year old it’s probably a good idea to follow them.
To help us with this step by step is Craig Simpson from Maverick’s UK distributor Extra UK. He’s the customer service and tech bloke, and if you have a problem with your fork you can contact him on the number below.
TOOLS FOR THE JOB:

5wt Silkolene fork oil / Adjustable spanner / 10mm socket / 12, 13, 21 and 28mm spanners / Syringe / Shock pump / Loctite 243 threadlocker
Maverick spares from Extra UK 01933 672170

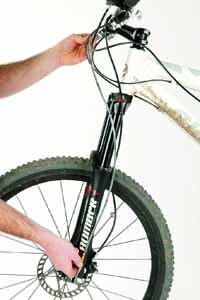
1 Remove the front wheel, disc brake and then the fork from the bike. Hold the steerer tube horizontally in a workstand or vice to stop the lubrication oil spilling out when you remove
the legs.

2 Remove the air cap (Craig uses a specific Maverick tool) and depressurise the spring in the left fork leg.

3 Using a 10mm socket, undo the nut in the top of the leg.

4 Remove the left leg and make sure the black top-out bumper is attached to the shaft. If it’s floating about in the upper, fish it out with a spoke. Follow the same procedure for the right leg.

5 With a good quality 21mm spanner (not an adjustable) remove the silver top cap.

6 Pull out the negative spring and retainer. The stock spring won’t be colour coded but soft and hard negative springs are painted green and yellow. These simply clip onto the black plastic retainer.

7 Remove the damper cartridge from the right leg with a 28mm spanner (26mm on DUC forks) or a large adjustable.

8 Cycle the plunger twice so any air comes to the top. With a small screwdriver release air until you see oil bubble out of the valve.

9 Remove the top cap with the 21mm spanner, then the silver aluminium seal head damper.

10 Hold the square part of the compression shaft with an adjustable, 12mm spanner or in a vice with soft jaws and loosen the locknut with a 13mm spanner.

11 The piston head shown from both sides. Note the recess on the left. This holds the shim stack and makes it harder for the oil to bypass the shims.

12 The stock configuration for the three shims is (descending) small, medium and large, but you can place the small shim between the other two. Light riders can also dispense with the small shim altogether. As with any modifications it’s worth consulting the tuning chart, doing only one change at a time and making detailed notes of any settings used.

13 After reconfiguring the shim stack to your liking, refill the cartridge with oil to a mark 63mm from the top. Craig uses a syringe that is exactly 63mm long and simply sucks out any excess oil.

14 Next compress the rod into the cartridge. If it doesn’t go in fully, it’s too full, so ‘burp’ oil through the air valve with a screwdriver.

15 Work backwards rebuilding the fork, making sure you pressurise the damper to between 50 and 90psi. Additionally, before screwing the damper cartridge back into the leg put a smear of blue Loctite on the threads.
TOP TIPS:
Before re-fitting the damper, position the seal head damper over the two rebound ports to stop oil jetting out onto the floor.