 Two-piece cranks are pretty much the norm, at least on mid to high-end bikes. They’ve gained favour thanks to increased stiffness and theoretically improved bearing life.
Most designs are outwardly similar but all use slightly different fitting and adjustment techniques due to alternative bearing preload methods. Rather than using a threaded cap to load the bearings, elastomer compression washers sit at the centre of Race Face’s X-Type chainset system. Full instructions are included, or can be easily downloaded, but we feel there are a few extra tips and ideas that should help steer you in the right direction, whether you’re a first-time fitter or are re-fitting after some maintenance.
SPACER OPTIONS:
Before starting, it’s well worth checking the instructions or logging onto raceface.com and downloading the installation guide for your chainset. This way you can ensure the correct sized preload elastomer, number and position of additional sealing spacers. This will prevent an annoying partial disassembly and part swap. You could bargain on a trial-and-error methodology, but with the vast array of possible options you’re likely to be there for quite some time.
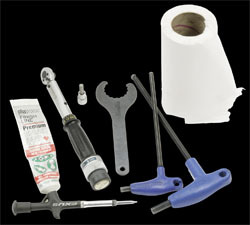
TOOLS FOR THE JOB:
Rag or cleaning cloth, 8mm and 10mm Allen keys, Park BBT9/Shimano TL –FC32 or 33 or similar external BB cup spline tool, grease. Optional torque wrench with 8mm Allen fitting.

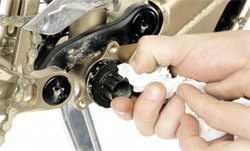
1 Once the old chainset and bottom bracket have been removed, thoroughly clean the bottom bracket threads and inspect them to make sure there are no burs or swarf from manufacture or previous fitting. If it is not already done, it is a good idea to get the bottom bracket shell faced so that the two faces are perfectly parallel. This will prevent the bearings in this outboard bearing design becoming misaligned and guarantee maximum life expectancy. Any good bike shop should be able to do this for you.
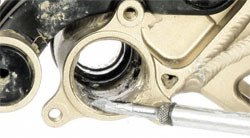
2 Once clean, grease the threads.
3 Your bottom bracket shell width and front mech type determines how many 2.5mm spacers you will need to insert between the bearing cups and the bottom bracket shell. For 68mm shell, 2 drive, 1 non drive; for 73mm shell, 1 drive side. If an E-type mech (or chain retention device) is used, reduce the drive-side spacer count by 1.
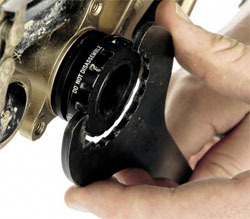
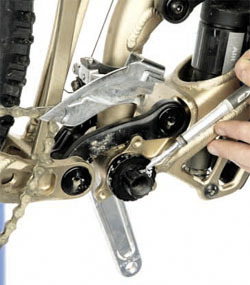
4 Place any required spacers between the bearing and bottom bracket shell and screw the drive-side cup in. It has a reverse thread so it tightens anti-clockwise.
Make sure to nip the cup up fully. It must be tight up against the spacer or E-Type front mech.
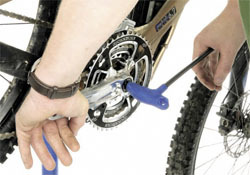
5 Insert spacers as/if needed and screw the non-drive side cup into the frame.
A standard thread is used, so tighten clockwise.
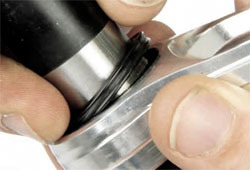
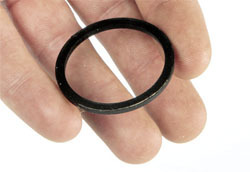
6 Push chosen preload elastomer into recess on rear of left-hand crank.
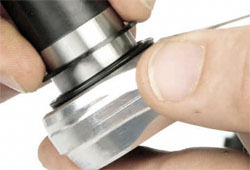
7 Slide 1mm rubber spacer/seal onto axle.
8 Apply grease to the polished areas of the axle.

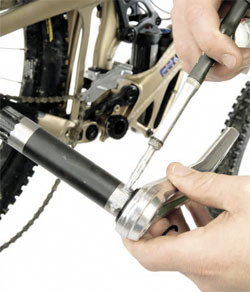
9 Slide left-hand crank and axle through the bottom bracket from the non-drive side. Take care to keep the axle perpendicular to the bearings or you can damage the inner, plastic bearing sleeve. The axle may be a tight fit through the bearings so a couple of taps with a rubber mallet may be needed.
Spread grease, removing excess before inserting axle through bottom bracket.
10 Clean any dirt that may have fallen onto the axle splines during installation.
11 Slide any required spacers onto exposed drive-side axle. Grease the splines.

12 Check the drive-side crank splines are clean and free from debris before fitting.
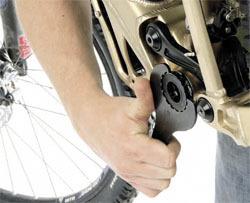
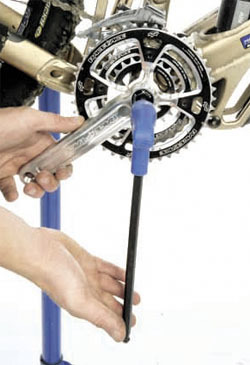
13 Slot the drive-side arm onto the axle. Slowly screw the 8mm Allen key until the arm nips up against the axle. Make sure the crank arms are at 180° to one another (don’t laugh, we’ve seen it done plenty of times). Tighten the crank bolt until the crank bottoms out on the spindle. This will seem as if it needs too much pressure, but you can feel and hear when the cranks hits the stops. The first time the cranks are fitted, there is often a lot of resistance to this bottoming out, so it is a good idea to wind the crank off (using the 10mm Allen key release) and slide it on again. It will be noticeably easier the second time.
14 Always check the 10mm Allen key release bolt is fully tight. Take note that (like the drive-side bottom bracket cup) it’s a reverse thread. This just needs nipping up. Don’t be tempted to hang off the, inevitably long, handle of the 10mm Allen key.
WARNING:
X-Type cranks come with a 3.5 and a 2.5mm preload elastomer to account for variations in finished bottom bracket shell width, while maintaining perfect chain line. Raceface.com has installation instructions with a chainline position and spacer requirement chart that should be consulted before beginning.
TOP TIPS:
Wrap the chain around the bearing cup before attaching the drive-side crank, then slotting it onto the granny ring as you attach the drive-side crank arm. This will save you wrangling with the chain to stretch it around the whole chainset later.
If you are unsure or nervous about the amount of force needed to get the crank bottomed out, use a torque wrench. You can expect to need at least 30ft/lbs and possibly up to 50ft/lbs.