Clean, check, lubricate your mountain bike chain to keep it running smoother and longer
Too many riders leave neglect proper bike chain maintenance, which leads to excess wear, increased chain slap and poor shifting performance.
By Charlie Collins
Thing you will need
- Chain lube
- Chain cleaning device
- Degreasing cleaner
- Steel ruler/chain checker
- Time taken: 30 mins
- Difficulty: Easy
It goes without saying, the chain is a critical component in your bikes drive train, connecting the power from your legs to the rear wheel. In this guide we’ll cover simple upkeep and simple service checks you can do to ensure your chain is up to the job.
How quickly a chain wears is dependent on a few variables; rider power, maintenance regime, other components condition and riding environment. When a chain wears it becomes ‘stretched’, which refers to the roller/pin/bushing components of the chain becoming worn as they rub against each other. This causes the pitch to increase and therefore the maximum length to increase too. And once the chain starts to wear it won’t mesh correctly with the cassette or chainring and quickly wear those too.
To check for wear you should try to measure your chain when it’s in tension on the bike. Park Tool suggests replacing 11/12 speed chains at 0.5% wear and 8/9/10 speed chains at 0.75% wear.
Bike chain maintenance
To get the most life from a chain, you should regularly clean and lubricating your chain. Clean your chain every few rides, or directly after any muddy rides. You should then apply a suitable lubricant and ensure it’s lubed correctly for each ride. Check back next month where we’ll be covering the rest of your drivetrain maintenance and checks.
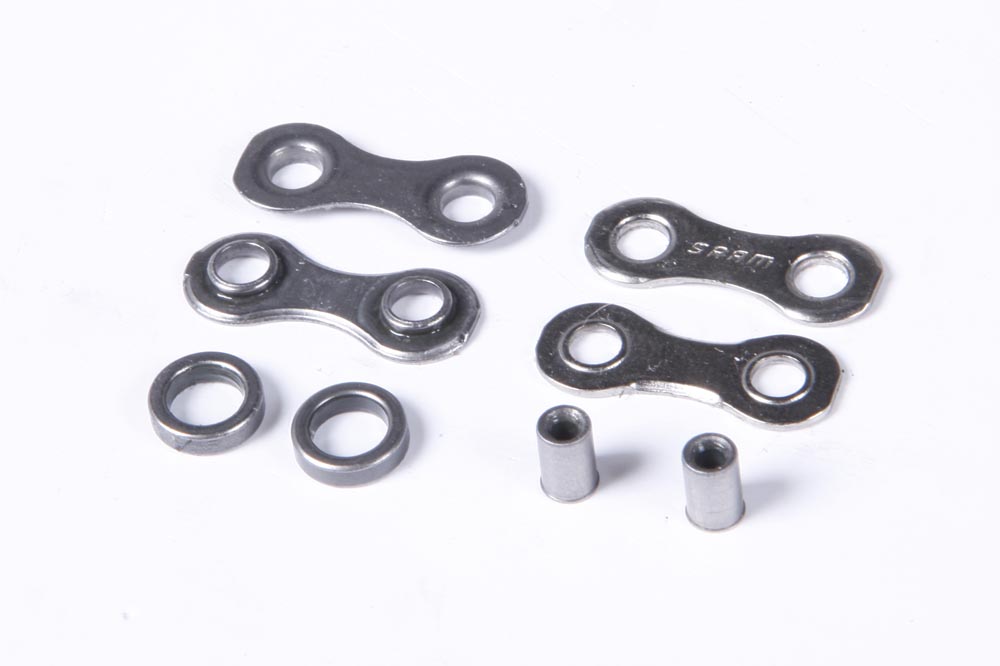
Know your chain
There are five main components within a chain as shown below. The bushing is part of the inner link plate and is actually a stepped lip to sit inside the roller once assembled.
1. Clean it
Clean the chain when fitted to the bike using a chain-cleaning device. If you don’t have one it’s recommended to remove the chain via split link – to prevent oil contaminating braking components – and clean with an old toothbrush and degreaser. If you have to do it on the bike remove the rear wheel and cover braking components with a cloth first.
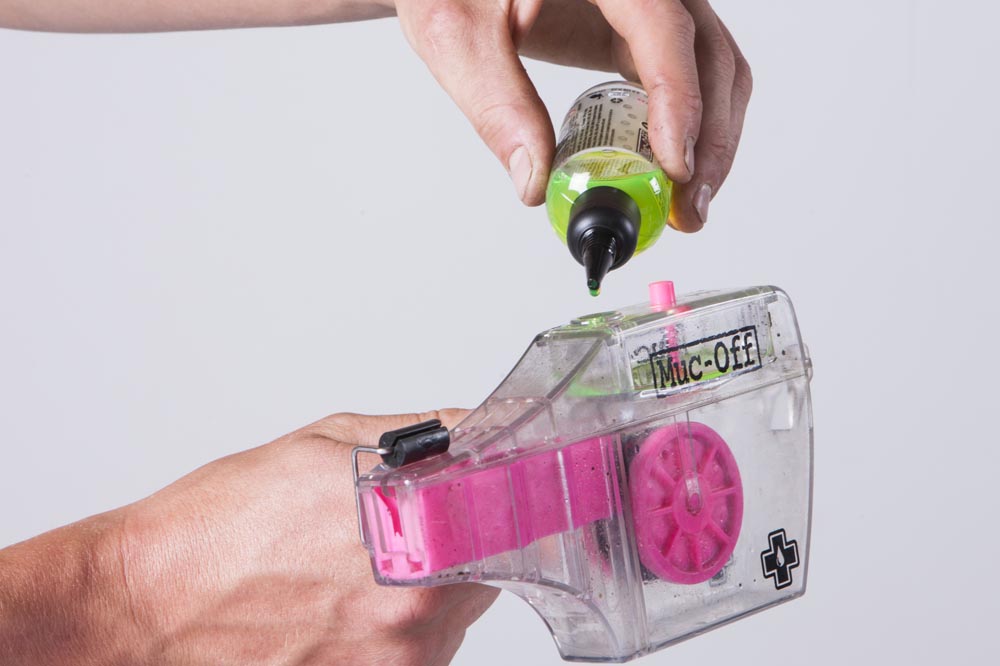
1 Fill device to specified amount of degreasing fluid. Fit around chain and clamp lid.

2 While holding device still, rotate cranks backwards around 20 times to ensure chain is fully cleaned.

3 Rinse off chain with soapy water and dry thoroughly with rag.

2. Check it
It’s recommended to use a fixed, drop in chain stretch measuring tool such as the Park Tool CC-3.2 or Shimano CN42 (The CC-3 pictured is an outdated version).

First insert curved end followed by the other end. If it drops in, the chain is stretched. 11/12 speed chains replace at 0.5% wear and 8/9/10 speed chains at 0.75% wear.
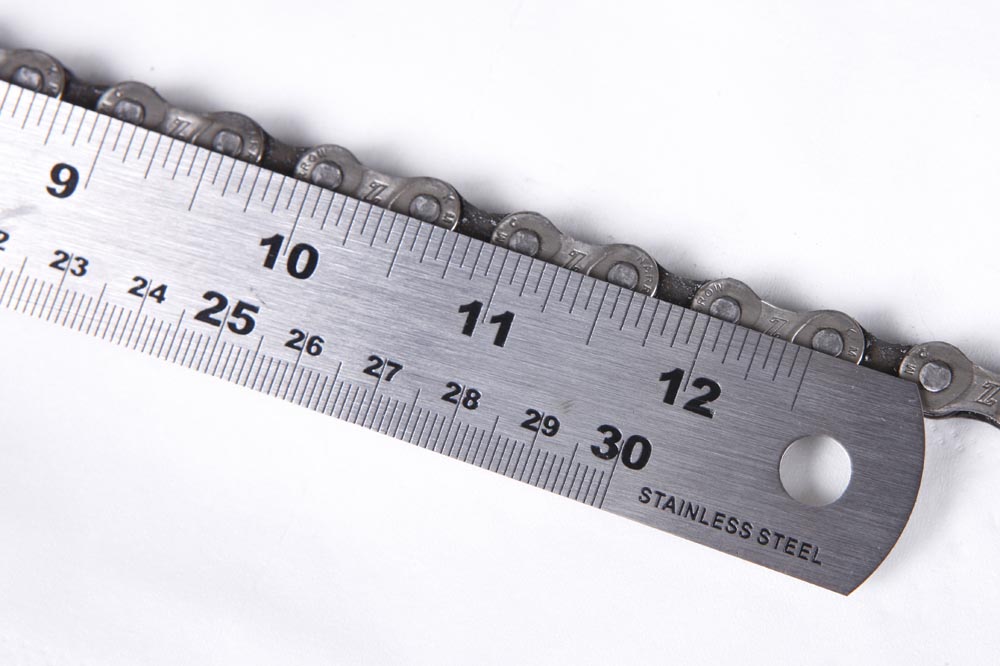
1 No tool? Use a steel rule. Place the start of the rule in the center of one chain pin. Then count 12 links (1 link = 1 inner + 1outer), a new chain will measure exactly 12 inches. 0.5% wear will be at 12 1/16in and 0.75% wear will be at 12 1/8in. The chain shown here is just under 0.5% worn.
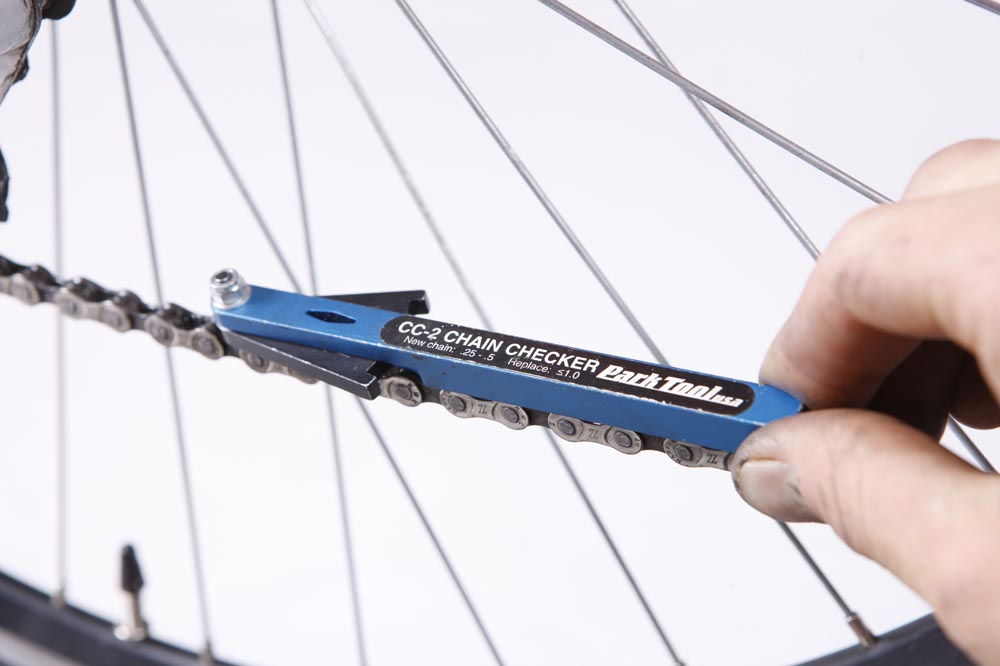
2 Sliding or rotating chain stretch tools such as the Park Tool CC-2 can give variable results dependent on hand pressure, so its preferable to use a fixed type tool or steel rule.

3 Lateral movement in a worn chain greatly increases and causes excess chain slap noise and poor shifting. It’s difficult to measure, so see the difference – the above photo shows a new Shimano chain and the photo below is a worn chain.

At this stage, also check for any stiff links and scrapes from impacts.
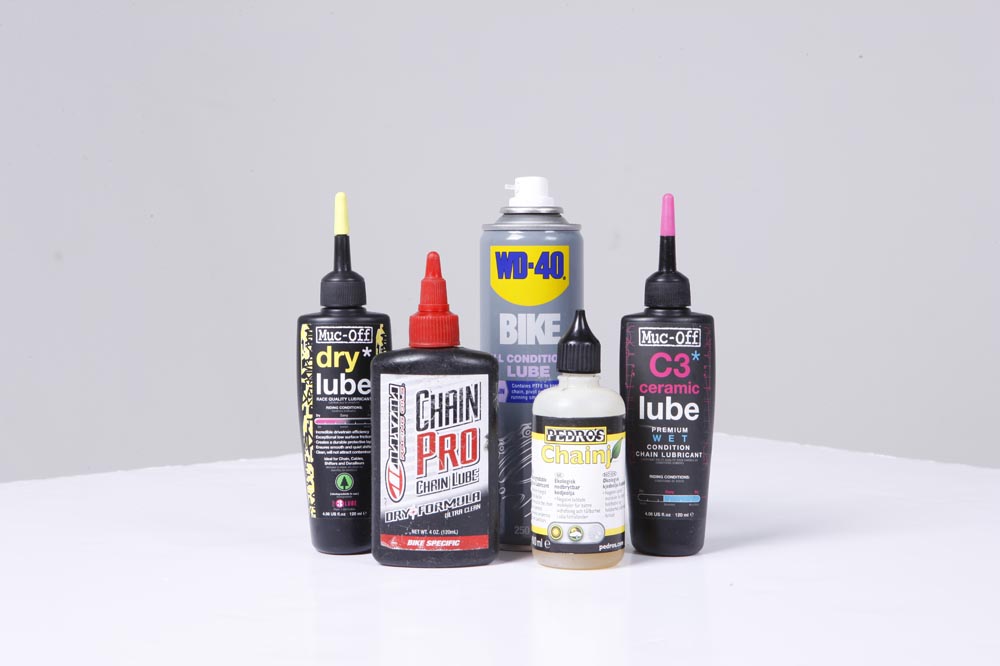
3. Lubricate it
There are a variety of lubricants on the market in spray and bottle form, with specific formulas for wet and dry conditions. Using WD40 or 3-in-1 oil may seem pudent but it won’t things running smoothly and will cause dirt and grime to stick to the chain and prematurely wear.
Dry lube
Based on teflon or wax. Goes on thin, dries to chain to reduce dirt sticking, can wash away quickly. Use in dry dusty conditions. Apply an hour before every ride.
Wet lube
Oil based. Goes on thick, stays wet on chain, attracts dirt but doesn’t wash away easily. Use in wet conditions. Apply when chain dries out, clean in-between applications to prevent dirt buildup.
Spray lube
Chain specific lubricants from a spray can risk contaminating braking components when used. Ensure these are covered before applying, or remove chain to lubricate.

1 Ensure chain is clean. While spinning cranks backwards, apply lubricant to the top of the chain underneath the chain stay. Make two passes of the full length of chain.

2 Rotate cranks backwards 10 rotations to ensure chain is fully lubricated. Wipe away any drips/excess lubricant.

Charlie says…
Disconnect split link – Use adjustable pliers to pinch the two opposite fixed pin ends of the split link to easily remove without damaging.