 Plenty of bikes come specced with Shimano disc brakes. After a season or so of use, or before a trip somewhere big and hilly, it’s worth giving them the once-over just to make sure they are in tip-top condition.
Disc brakes get hot. Heat at the caliper and rotor is transferred to the brake fluid. If this gets too hot, moisture in the fluid begins to boil, expanding in the process and increasing pressure in the system. But, as it is under pressure it has to cool down before any gas is released. This is the reason your brakes can feel OK one minute and back to the bars the next. It is this gas, along with miniscule leaks and faulty seals, that can cause air in the system. Air pockets in the hose get compressed as the lever is pulled and lead to the mushy lever feel of disc brakes in need of a service. The DoT fluid used in most other manufacturers’ brakes is more prone to moisture absorbency, but the mineral oil Shimano uses is still hygroscopic (readily absorbing water from its surroundings), just to a lesser degree. Over time, the fluid decays, reducing its effectiveness at transferring pressure from the master to the slave cylinder.
Many Shimano brakes are only available in kit form; the buyer chooses a lever and caliper separately and builds the system from scratch. The brakes need priming with oil and then bleeding. This How To works for initial bleeding, as well as routine servicing.
When it comes to tools, the Shimano disc brake bleeding tool (TL-BT 02) makes life a lot simpler, but it is not strictly necessary. Just wrapping some rag around the brake lever reservoir and pushing the fluid through the brake would work just as well.
TOOLS FOR THE JOB:

Phillips screwdriver / 3 and 5mm Allen keys / 7mm spanner / Pliers / Shimano disc-brake bleeding tool (TL-BT 02) / Shimano mineral oil / Brake chock / Rag or cloth
Contact: ultimate-pursuits.co.uk

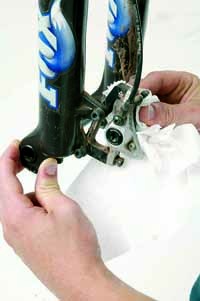
1 With a rag or cloth, clean the caliper, especially around the bleed nipple.

2 Remove the pads from the caliper, as any brake fluid on the pads will necessitate replacement.

3 Fitting the pad spacer that comes with the brakes will allow you to pump the brakes during the service without overfilling the system.

4 Loosen the brake lever and rotate the lever body until the reservoir is completely horizontal. Tighten the Allen key back up with the lever in this new position.

5 Remove the reservoir cover, and then carefully remove the diaphragm, taking care not to damage the rubber.

6 Attach the bleeding tool, taking care that the plastic tube is central over the reservoir.

7 Wrap the brake caliper with a cloth or rag, to catch any excess fluid that escapes during the servicing.

8 Tighten the clamp by pumping the larger lever. Do not overtighten the clamp.

9 Fill the syringe with brake fluid.

10 With the syringe upside down, expel any air inside, just like in the movies!

11 Push the hose onto the bleed nipple, loosen the nipple and pump fluid through the system. Nip the bleed nipple up when you finish pumping fluid.

12 Pump the brake lever and watch for bubbles. If there are some, repeat the previous step.

13 Tighten the bleed nipple to 0.3-0.5Nm before removing the syringe. When removing the syringe, pull out the plunger to introduce air into the plastic tube. This will prevent too much oil spillage.
14 Once everything is tight, give the brakes a final pump for a bite point check. Do they feel OK? If so reverse steps 5 to 2. If not repeat 11 to 14. Job done — wipe down and enjoy!
TOP TIPS:
Removing the nipple cover gives the hose more to bite on to, reducing the likelihood of a messy blow-off.
Leaving the ring end of the spanner over the nipple means it is always there for emergency nip-ups.
If you’re not using the official bleeding tool, wrap a rag around, or hang a cut-off bottle underneath, the reservoir to catch the overflow.