15 minute fix
Whether you want better ergonomics or you’ve just smashed your old one in a crash, here’s how to fit a better cable-activated dropper post remote.
>>> The best mountain bike dropper posts
Fancy a dropper remote upgrade? Whether you want something more ergonomic, something that integrates with your brake lever or you’ve just smashed your old one in a crash, here’s how to make the swap.

Step 1
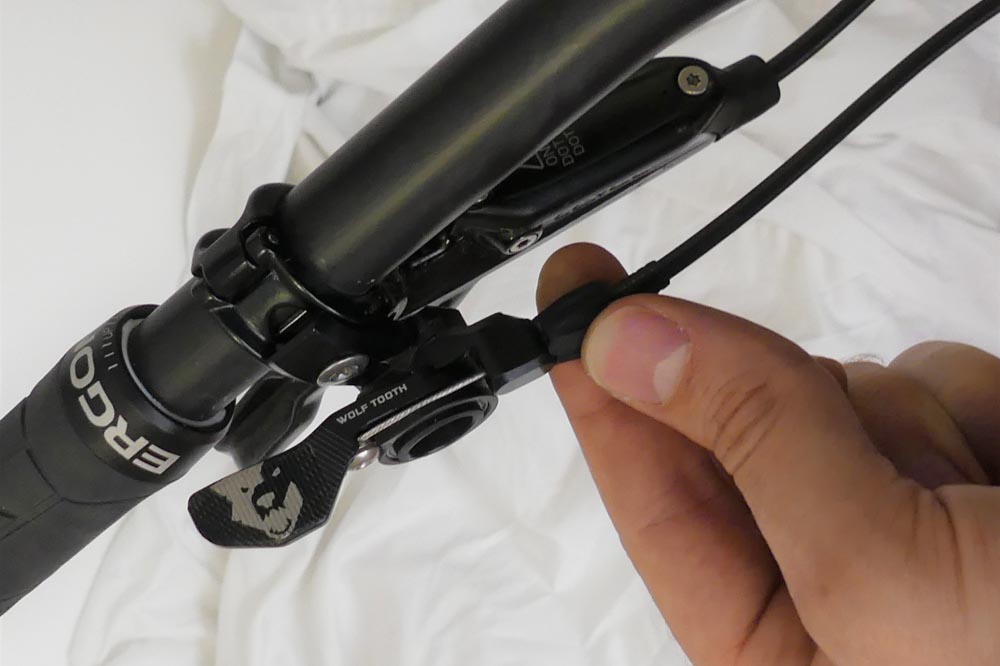
Check where the inner cable is clamped – at the lever or the post? Unclamp the cable. If it’s clamped at the post you may need to remove your remote from the bars to get enough cable slack to remove your post for access.

Step 2
Remove the remote from the bars. If your post is internally routed (Stealth/Covert) only ever remove the inner or outer from the frame at any one time. Removing both could make fitting a new cable a load of hassle.

Step 3
Check the cable routing. You may need more or less cable outer depending on your new remote’s design. Make sure you have just enough slack for full steering function. Whilst you’re at it maybe you can ditch your inline cable adjuster if you have one fitted and your new remote has an integrated adjuster.
Step 4
Fit the new remote (do not overtighten any clamps) and any cables – gear outer is recommended over brake. With the cable clamped check the post’s operation – ensure that steering doesn’t activate the post! This is usually caused by too much cable tension or cable outer that has been cut too short.