 There are two parts to a Shimano clipless system: the pedal, which screws into the crank arm; and the cleat, which bolts onto your shoe. The right pedal, the one that bolts to the crank with the chainrings fixed to it, screws on the normal way — like a bottle top — but the left-hand pedal screws on the opposite or ‘wrong’ way. It has a reverse thread and turns anti-clockwise to tighten. Pedals need to be tight, which we’d describe as ‘snug’. We’d also grease the axle when fitting the pedal to the crank arms and use those thin washers if you have them.
The cleat fixes to a plate inside the shoe called a cleat nut. There are two fixing points and the nut also slides up and down in the shoe, so it offers a wide range of adjustment options. We’d start with the cleat in a central position and make any small changes from there.
Two types of cleats are available for Shimano pedals — single release and multiple release. The former come stock with all SPDs and disengage by twisting to the side, whereas the latter disengage by twisting or just pulling up. We’ve used both and we’d recommend the single release cleat, it’s more secure and there’s less chance of accidental release.
Once you’ve used SPDs and become a dab hand with them, there are a few things worth keeping an eye on. The screws holding the body cover can come loose and need checking from time to time. The bearings in all Shimano pedals are also pretty small, so again they need regular servicing. If you unscrew the axle assembly from the pedal you’ll be able to see the bearings, which can be cleaned and regreased. If the bearings are seized or badly worn then replacement axle assemblies are available. Some Shimano pedals come with cages, like the PD-M647 or PD-M545. These are designed to protect the pop-up bindings but do take the knocks, and in the case of the plastic 647 can break. They can be replaced and we’ve included a few points to show you how.
TOOLS FOR THE JOB:

Allen keys / grease gun / 17 and 20mm spanner / Phillips screwdriver / All Shimano axle assemblies can be bought through www.ultimate pursuits.co.uk

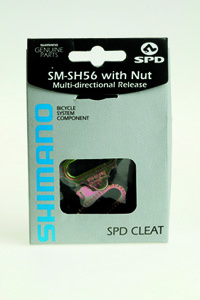
1 There are two different types of SPD cleat — multiple release and single release. This is what they look like — the gold cleat (with the big ‘M’ on it) is the multiple release cleat. Spare cleats are £9.95 a pair

2 On most shoes the mounting plate (cleat nut) is sealed under the sole. You need to cut away the cover with a sharp knife, then get a screwdriver under one edge and peel it back with a pair of pliers.

3 Draw a cross on the sole, as shown, and fix the cleat in the centre. This neutral position allows you to tweak the angle of the cleat if needed.

4 Spot some grease on the threads then tighten the 4mm Allen bolts (alternately from one side then the other and back again) until tight.

5 On some shoes you may need to trim away part of the sole to allow the cleat to engage properly. Trimming the sole can also improve mud clearance around the cleat.

6 Release tension on all Shimano pedals is adjusted by a 3mm Allen key. Obviously the ‘+’ increases tension, and the ‘-’ decreases the tension. If this is your first time, start with the adjuster three turns in from fully open.

7 The fixed part of the pedal that holds the cleat is called the body cover. It can come loose so it’s worth checking tightness periodically. On 959s this is done with a 2.5mm Allen key, on other SPDs it’s a Phillips screwdriver.

8 To replace the axle assembly on a 959, loosen the locking collar (anti-clockwise) with a 17mm spanner. Here we’ve used a cone spanner, but an adjustable will suffice.

9 A used (top) and brand new 959 axle assembly (£24.95), with fresh bearings.

10 If the axle is dirty just clean off the old grease with degreaser and a rag.

11 You can dismantle the axle to its component parts but we’d just squirt some
fresh grease directly into the bearings with a grease gun.

12 The plastic cage on the 647 protects the pedal from damage but if it’s worn or broken replacements can be fitted easy — they’re £6.95 each.

13 Remove the cap bolt with a 4mm Allen key.

14 Loosen and remove the axle assembly (it unscrews anti-clockwise) with 20mm spanner. Replacements for 647 pedals cost £18.95 each.
15 Dirt and grit works its way down the threads of the collar, so make sure it gets a good coating of grease before refitting.
TOP TIPS:
If you’re new to clipless pedals, find some playing fields and get the feel of clipping and unclipping before you hit the trail.